Free video editing software does not have to mean watermarks, trial countdowns, or a tool that stops being useful as soon as you want to do something interesting. There are excellent editors that let you put together a complete video without paying for the basics.
My five favorites range from a simple storyboard editor to the application I use for my own YouTube videos, DaVinci Resolve. Some are entirely free and open source. Others offer a substantial free version with additional features available in a paid edition.
The biggest decision is how much editing power you need and how much time you want to spend learning. Here is what each editor does well, how the workflow works, and where you might run into limitations.
Version note: This comparison covers the versions reviewed, including the original Windows 10 Photos video editor and DaVinci Resolve 17. Features, availability, and licensing can differ in later releases.
Table of Contents
- 1. Windows 10 Video Editor: Simple Editing Without Another Download
- 2. OpenShot: Easy to Learn, With More Power Under the Hood
- 3. Shotcut: More Control for More Ambitious Projects
- 4. Kdenlive: Advanced Editing With Dedicated Clip and Project Previews
- 5. DaVinci Resolve: My Choice for a Primary Video Editor
- Other Free Video Editors Worth Knowing About
- Which Free Video Editor Should You Choose?
1. Windows 10 Video Editor: Simple Editing Without Another Download
The first option might already be on your PC. Windows 10 included a free video editor inside the Photos app. Not exactly the first place you would think to look for video editing software!
In the Windows 10 setup covered here, you can open it by typing Video Editor into the taskbar search field and selecting the matching app. Earlier access was through Photos, which helps explain why it was so easy to miss.
How the editing workflow works
This is the most approachable workflow of the five. Drag your video files into the project library, then drag individual clips onto the storyboard at the bottom. Arrange them in the order you want, and your video starts taking shape.
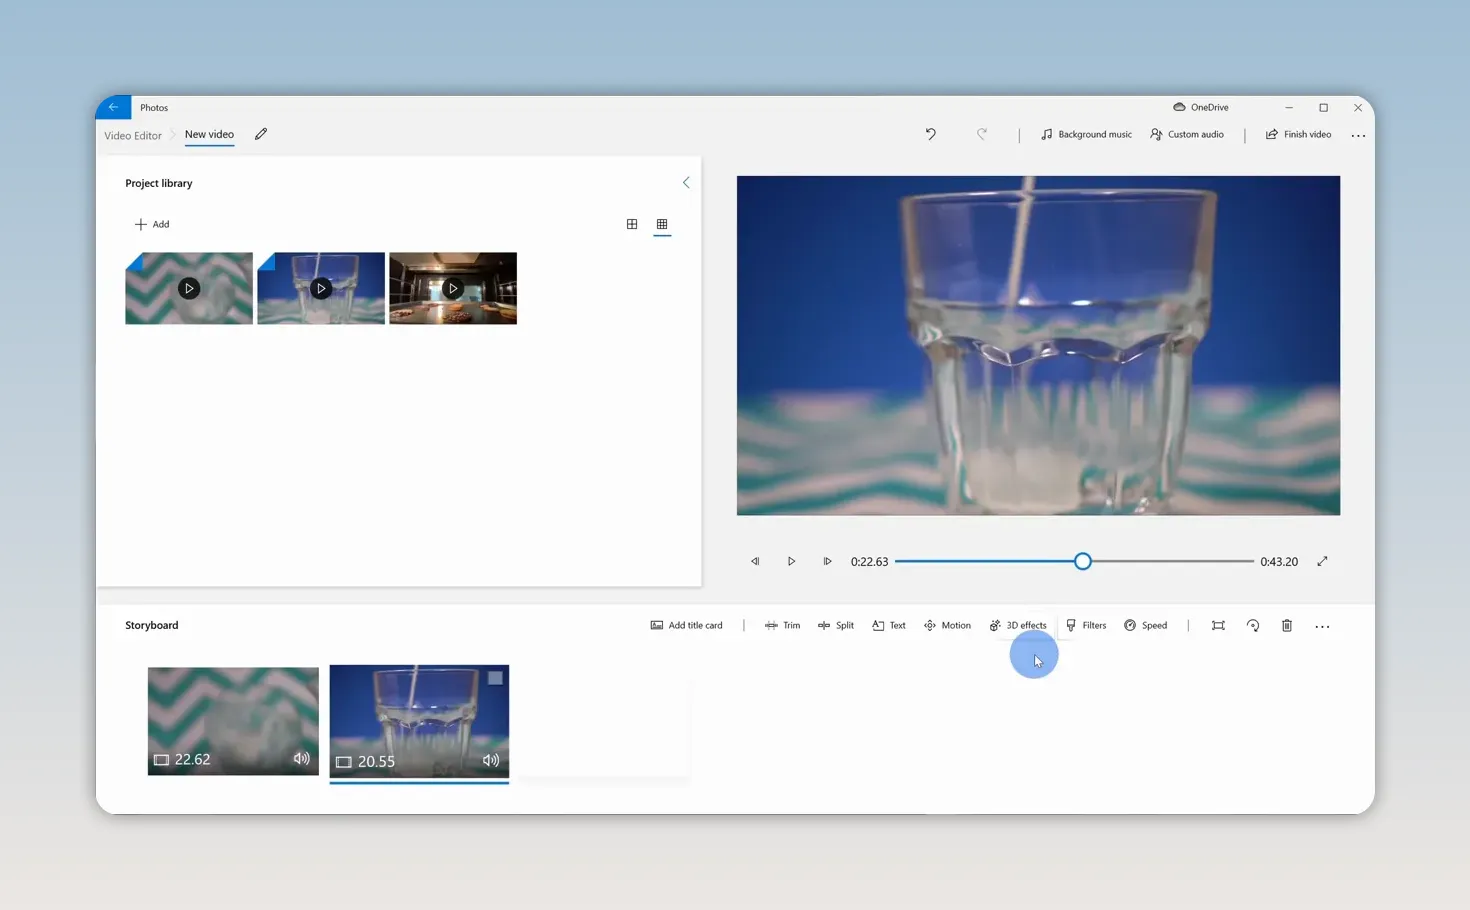
The common editing tools are right above the storyboard. You can trim clips, split them, add text, and make other basic adjustments without learning a complicated interface.
There are also two useful audio options:
- Background music: Choose a track from the built-in collection, with an option to sync the video to the music's beat.
- Custom audio: Add your own audio, such as a voice-over.
For a quick project, that is a nice amount of functionality without installing anything else.
Where it falls short
The simplicity comes with some significant trade-offs:
- No transitions between clips: The storyboard uses hard cuts, so you cannot add a dissolve or wipe between two clips.
- No layered video tracks: You cannot place one video over another to create a picture-in-picture effect.
- Built-in music restrictions: The music collection in the version reviewed was not suitable for monetized YouTube uploads.
- A 1080p export ceiling: Even if your camera records in 4K, the highest export quality available here is 1080p.
That last limitation matters if you want to preserve the resolution of your 4K footage. You can assemble a nice video, but you cannot export it at its original 4K resolution.
My take: Windows 10 Video Editor works well in a pinch for basic projects. For me, the lack of transitions, layered tracks, and 4K output makes it too restrictive as a primary editor.
For a closer walkthrough, I have a Windows 10 Video Editor tutorial.
2. OpenShot: Easy to Learn, With More Power Under the Hood
OpenShot is free, open source, and available for Windows, Mac, and Linux. Download the installer for your platform from its website, install it, and you are ready to start editing.
At first glance, OpenShot looks fairly simple. That is a good thing. You do not have to work through a wall of controls just to arrange a few clips, but there is more capability here than the interface initially suggests.
A straightforward multitrack timeline
Drag your media into the Project Files area, then drag those files onto the timeline. Unlike the Windows storyboard, OpenShot gives you multiple tracks, so you can layer items on top of one another rather than only placing them in sequence.
You also get a large selection of transitions and effects. The preview on the right lets you check your work as you arrange clips and make changes.
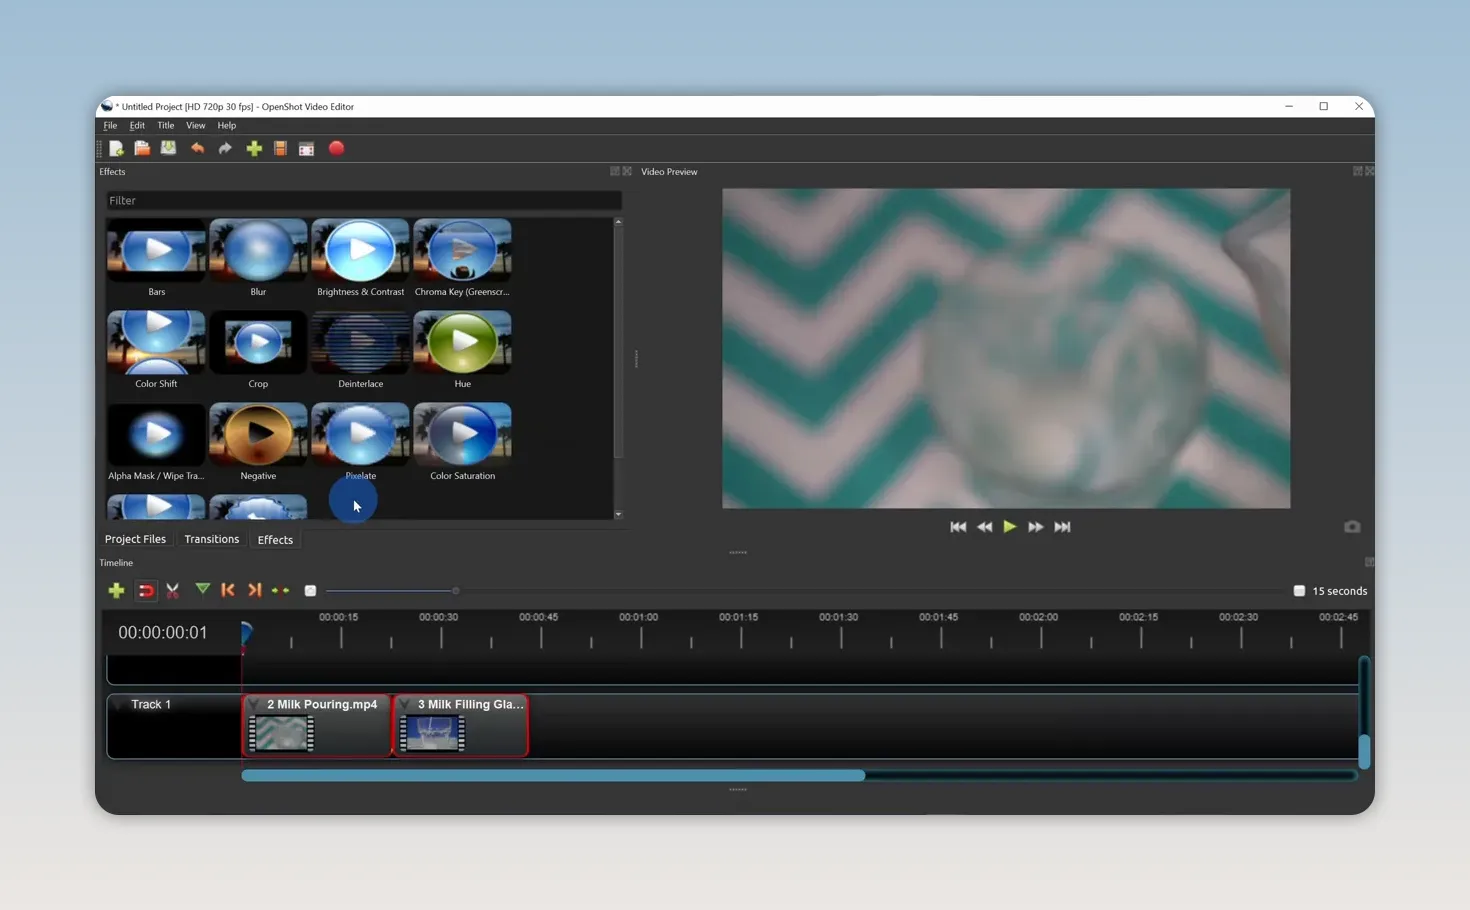
For more control, right-click a clip and open Properties. Here you can change clip values and work with keyframes. Keyframes let a setting change over time instead of remaining fixed for the entire clip.
That gives OpenShot a useful balance: it is approachable for a first project, with more advanced controls available when you need them.
The animated-title catch
Standard titles work directly in OpenShot. Animated titles require an additional application, Blender.
Blender is also free, so this is not a hidden charge. It is simply an extra installation and setup step before you can use that feature. A small inconvenience, but worth knowing about before you select an animated title and wonder why it does not work.
My take: OpenShot is an excellent choice if you want a simple free video editor without giving up tracks, transitions, effects, and keyframe controls.
My OpenShot beginner tutorial walks through getting started.
3. Shotcut: More Control for More Ambitious Projects
Shotcut is another free, open-source video editor for Windows, Mac, and Linux. It offers a more involved editing environment than the first two options, along with plenty of room to build more advanced videos.
After installing it, create a new project and select Start to enter the main interface. Drag your media files into the playlist, then move clips from the playlist onto the timeline.
Tracks, transitions, and filters
You can add additional video and audio tracks by right-clicking in the timeline area. That lets you organize multiple visual and audio elements instead of squeezing everything into a single sequence.
Transitions are particularly straightforward to create:
- Place two clips on the same track.
- Drag one clip so it overlaps the other.
- Shotcut automatically creates a transition in the overlap.
- Select the transition and open Properties to choose its style.
There is a large selection of transition styles. You can also select a clip, open Filters, and choose from a substantial catalog of adjustments and effects.
Workspaces that match the task
One feature I especially like is the ability to switch layouts depending on what you are doing. The editing view puts the timeline and preview front and center, but it is not your only option.
- FX view: Focus on effects work.
- Color view: Work on color grading with supporting scopes.
- Audio view: Focus on the project's audio.
- Player view: Give more space to reviewing the video.
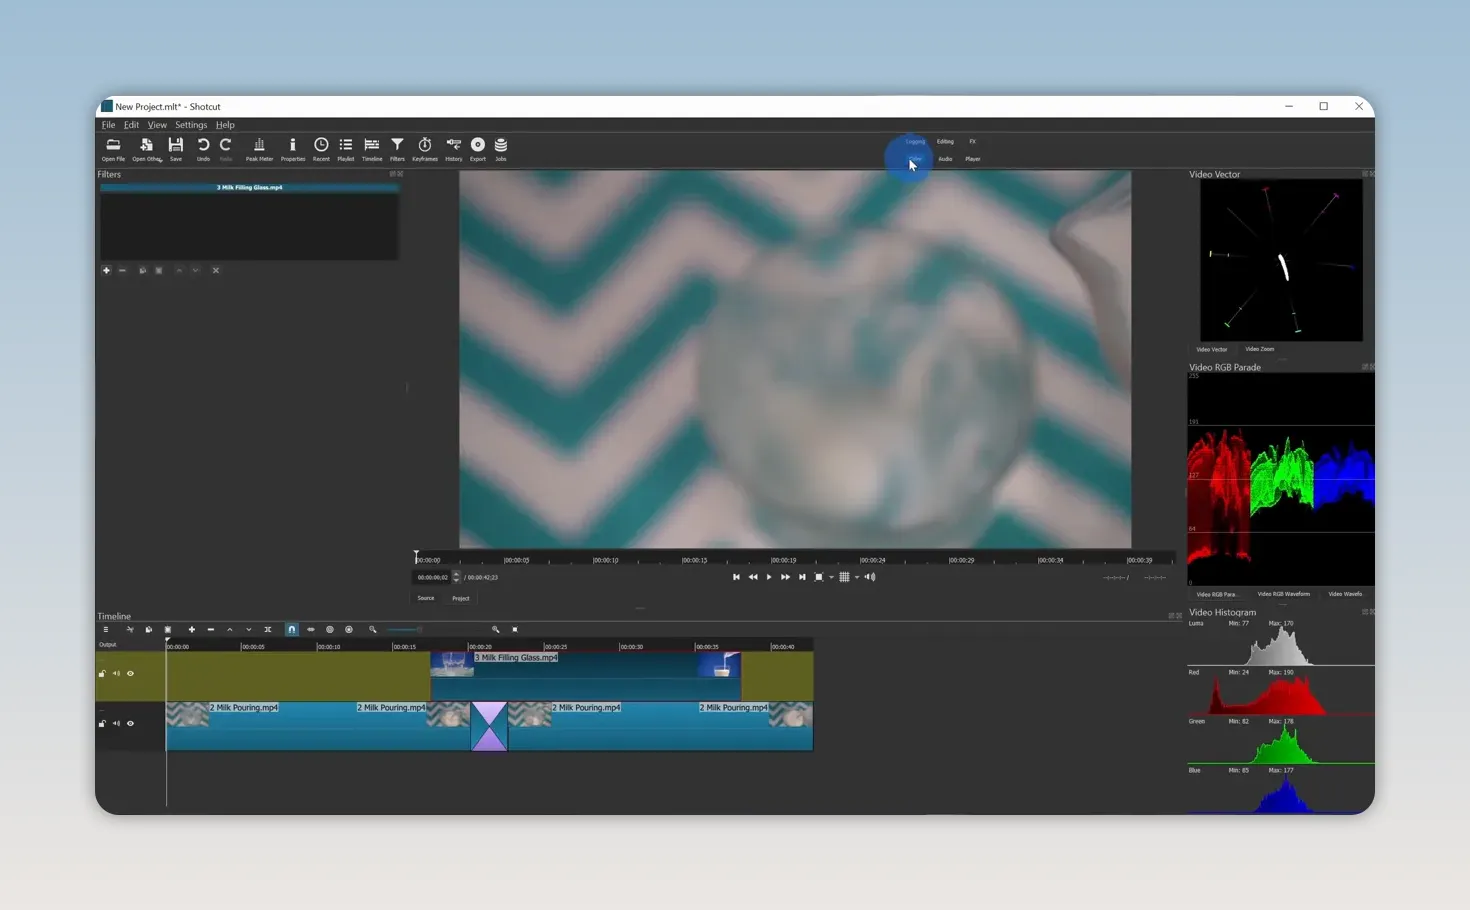
These layouts are helpful because you do not need every tool taking up space at the same time.
The drawback is the learning curve. Shotcut is more complicated than Windows Video Editor or OpenShot. If you only need to join a few clips, it may offer more controls than you want to learn.
My take: Shotcut is powerful enough that I could use it to assemble any of the videos on my channel at the time of this comparison. It is a strong choice if you plan to move beyond basic editing and are willing to spend a little more time learning.
For help with the interface and workflow, see my Shotcut tutorial.
4. Kdenlive: Advanced Editing With Dedicated Clip and Project Previews
Kdenlive is also free and open source, with cross-platform options for Windows, Mac, and Linux. Choose the appropriate download for your operating system and follow the installation process.
The main interface will look familiar after OpenShot and Shotcut. Import your files into the project bin on the left, then drag them onto the multitrack timeline. Clips can sit sequentially on one track or be arranged across separate tracks.
Two previews with different jobs
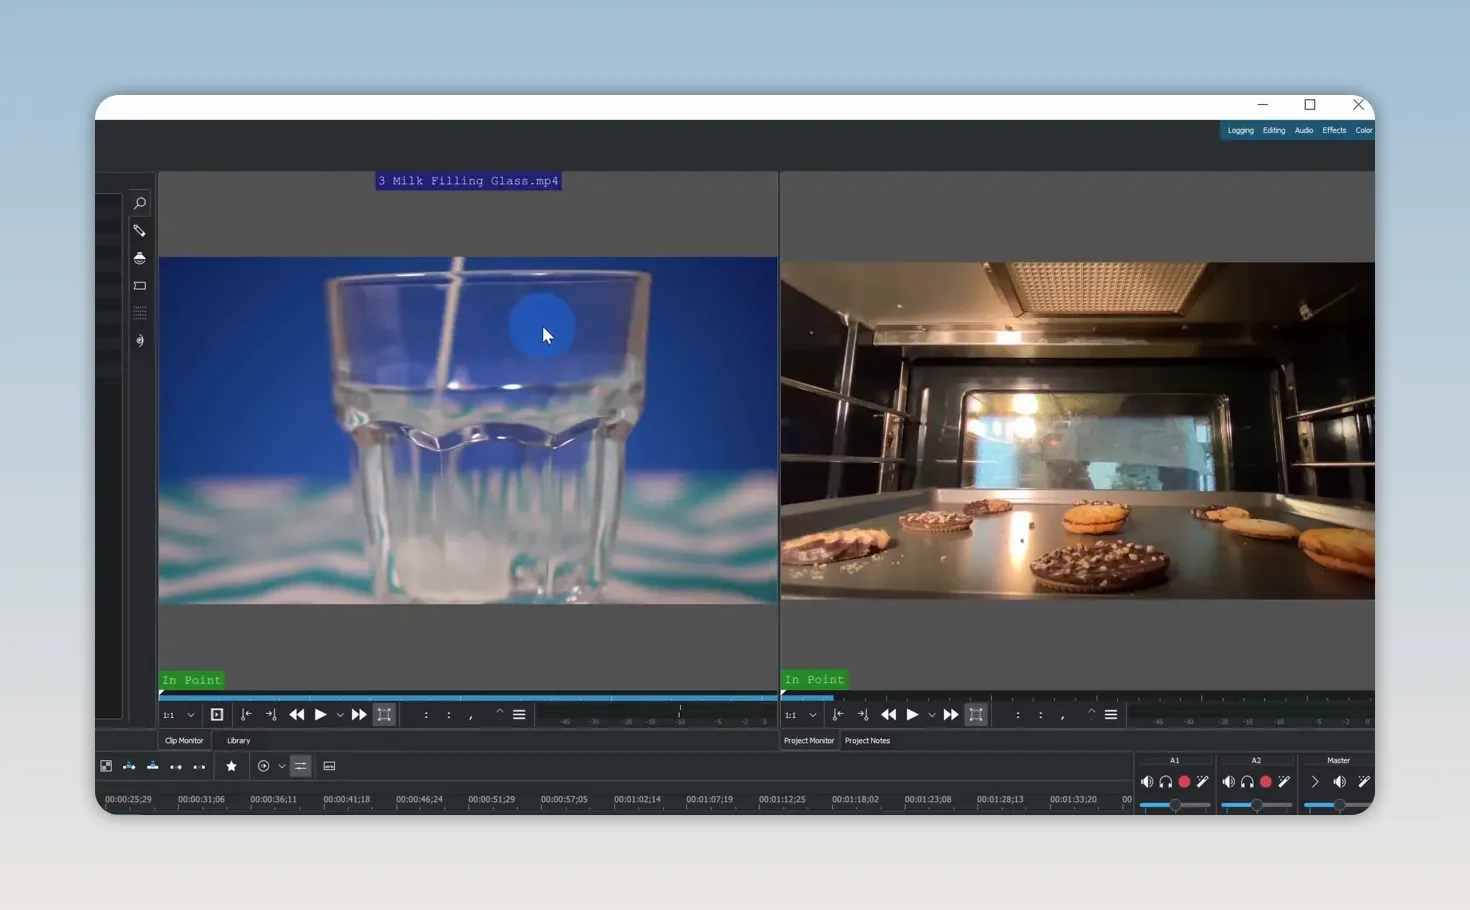
One useful distinction is Kdenlive's separate clip monitor and project monitor.
- The clip monitor lets you inspect an individual source clip.
- The project monitor shows the assembled video from your timeline.
You can inspect source footage while keeping the current project visible alongside it. Those two previews are not two separate finished videos. They are two views into different parts of the editing process.
Editing modes, workspaces, and effects
Kdenlive gives you several ways to place footage on the timeline, including normal, overwrite, and insert modes. For example, overwrite mode replaces existing material where you drop a clip, rather than treating every placement the same way.
Like Shotcut, Kdenlive also provides task-focused workspaces. You can switch from editing to a dedicated audio, effects, or color-grading layout.
For transitions, open Compositions and choose an option such as a wipe. Add it between the relevant clips to create the transition. There is also a broad selection of effects you can apply to individual clips.
All those controls make Kdenlive capable of impressive, advanced projects. They also make the initial learning process more demanding. Fortunately, there are plenty of online help resources to support that learning.
My take: Kdenlive is a good option if you want a flexible, open-source editor with multiple editing modes and a more advanced workflow. Just allow some time to get comfortable with the interface.
5. DaVinci Resolve: My Choice for a Primary Video Editor
DaVinci Resolve is the editor I use to put together my own YouTube videos. It is an impressively capable application, and it is also used for television and film projects.
Unlike OpenShot, Shotcut, and Kdenlive, Resolve uses a freemium model. Its core editing capabilities are free, while some additional effects and tracking features require the paid Studio edition.
I have been able to do the editing I need with the free version. That is a fairly compelling price for an application with this much capability.
Choose the free edition, not Studio
The download options for Resolve 17 include standard DaVinci Resolve and DaVinci Resolve Studio. Studio is the paid edition. To use the free version, choose the standard edition, then select your operating system.
The download page may also offer older releases. My recommendation is to choose the latest release offered for your setup rather than automatically selecting an older version.
More than a timeline editor
The basic editing process is familiar: import media, drag clips onto the timeline, and organize the sequence. You have separate source and project previews, along with controls for video, audio, effects, and transitions.
What makes Resolve stand out is how many specialized tools it brings together in a single application. Its interface is divided into pages:
- Media: Organize and inspect your media files.
- Cut: Assemble and cut footage in a workspace designed for speed.
- Edit: Work in the standard timeline-editing environment.
- Fusion: Create visual effects and motion graphics using a node-based workflow.
- Color: Use advanced color-correction and grading tools.
- Fairlight: Adjust and refine your project's audio.
- Deliver: Prepare the finished project for output.
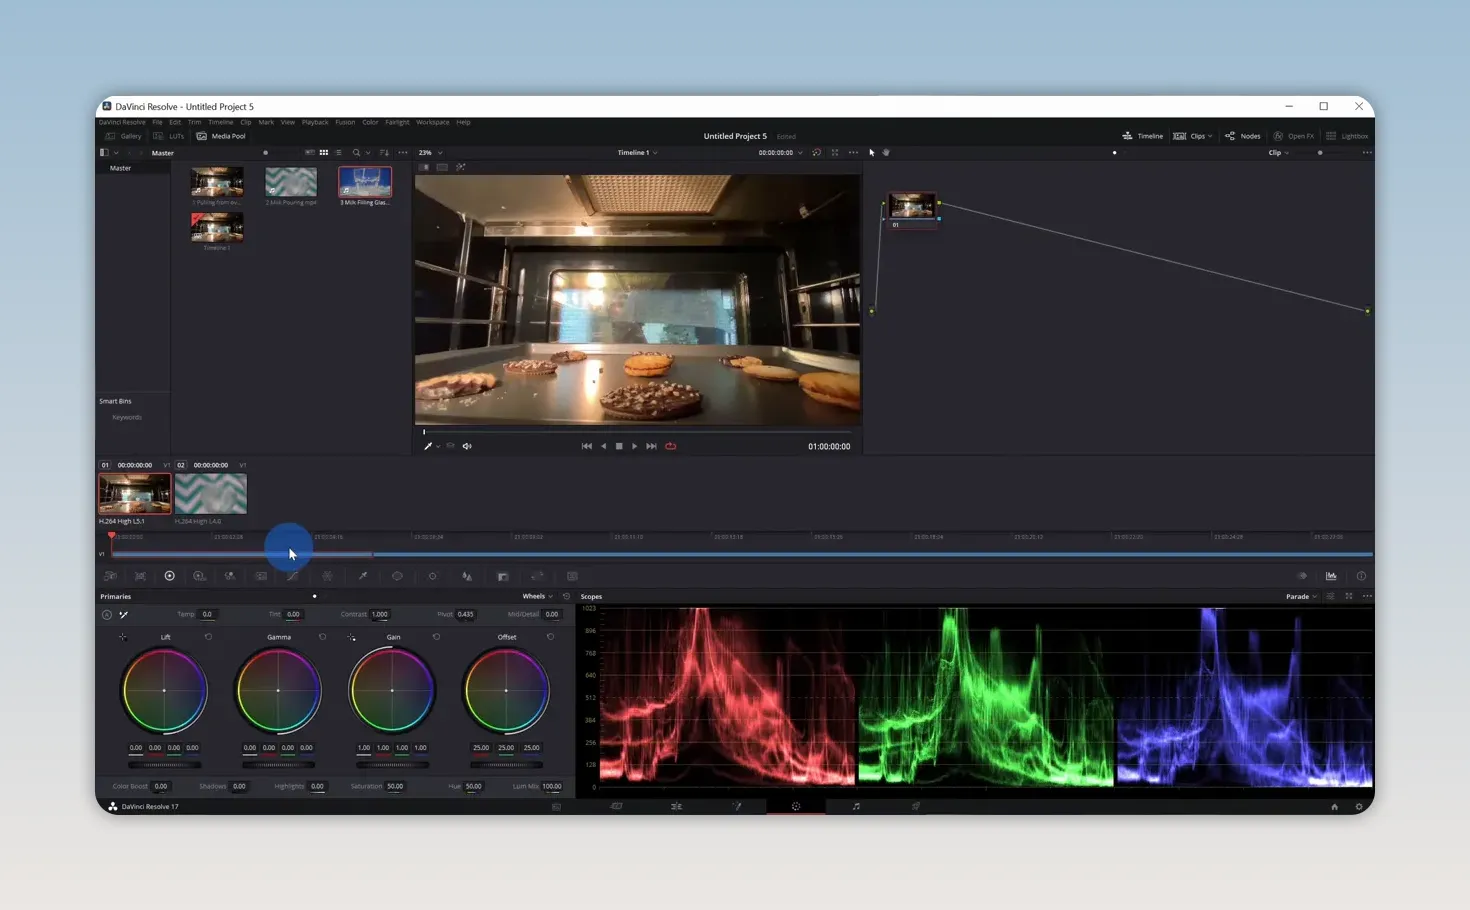
The Color page is a particular strength, with industry-leading tools for controlling the look of your footage. Fairlight is a powerful audio environment in its own right, while Fusion provides a completely different way to build visual effects by connecting nodes.
These could almost be separate applications. Having them together means you can move from editing a clip to working on its visual effects or audio without leaving the project.
The biggest trade-off: learning time
Of these five editors, Resolve arguably offers the most advanced functionality. It belongs in the same broader conversation as tools such as Adobe Premiere and HitFilm Pro, while still letting you start for free.
But it also has a very steep learning curve. Even as my primary editor, it constantly gives me something new to learn. That can be intimidating at first, but it is also part of what makes the software exciting.
My take: If you want a primary editor with substantial room to grow, DaVinci Resolve is an excellent choice. If you want the quickest possible route to a simple finished video, one of the earlier options may be a better fit.
My DaVinci Resolve beginner tutorial covers the starting workflow.
Other Free Video Editors Worth Knowing About
The five above are not the only options. Three more deserve a mention, although their free editions have qualifications worth understanding.
VSDC Video Editor
VSDC Video Editor follows a freemium model. You get most core functionality for free, with some features reserved for a paid upgrade. It is another option if the main five do not quite match your preferences.
HitFilm Express
The reviewed version of HitFilm Express combines video editing and visual effects, making it similar in scope to some of what Resolve offers. It also follows a freemium approach, with a substantial free feature set and additional functionality available through upgrades.
VideoPad
VideoPad, made by NCH Software, offers a version that is free for home use. It works reasonably well for a free editor, but there are a few annoyances.
The free edition repeatedly reminds you that you are using it. It also limits areas such as the number of audio tracks and available plugins. The home-use qualification is important, too, so do not assume that free means unrestricted use for every type of project.
Which Free Video Editor Should You Choose?
The right choice is not necessarily the application with the longest feature list. It is the one that gives you enough control without putting unnecessary obstacles between you and a finished video.
- For a basic Windows 10 storyboard project: The original Windows Video Editor is easy to use, provided its limitations are acceptable.
- For simplicity with more flexibility: OpenShot gives you tracks, transitions, effects, and keyframes in an approachable interface.
- For more advanced open-source editing: Shotcut and Kdenlive offer broader controls and task-focused workspaces.
- For a long-term primary editor: DaVinci Resolve brings editing, visual effects, color grading, and audio together, with the largest learning commitment.
My own choice is DaVinci Resolve because of how much I can do in one application. But if you are just getting started, OpenShot's simpler approach may get you to your first finished project more comfortably. You do not need to pay for powerful video editing software. You just need to pick the level of complexity that fits what you want to create.
Made with VideoToBlog using 🎬 5 BEST FREE Video Editing Software


