A professional voicemail greeting and a lively podcast conversation can start with the same thing: a few lines of text. Google AI Studio’s voice generator turns that text into realistic AI speech, with controls for the voice, tone, pacing, and even little expressions like laughter.
I’ll use a fictional candy store, Elizabeth’s Candy Connection, to create two examples: a welcoming voicemail greeting and a two-speaker podcast trailer. Candy corn may cause a disagreement between our podcast hosts, but getting their voices set up is pretty straightforward.
What You'll Learn
- Turn a written script into AI speech and download the finished audio.
- Control delivery by choosing speaker voices and describing tone, personality, and pacing.
- Create two-speaker conversations with individual line directions, expressions, and optional filler words.
- Refine awkward delivery by simplifying style instructions and trying different expressions.
Create Your First AI Voice
Open the Google AI Studio voice generator. Start a new dialogue, then enter the words you want spoken in the text box.
For a first test, keep the script short. A voicemail greeting makes a useful starting point because you can quickly hear whether the delivery suits your business.
For my candy store, the greeting thanks the caller, asks for their name, phone number, and a short message, and promises a return call. You could use something like this:
You’ve reached Elizabeth’s Candy Connection. Please leave your name, phone number, and a short message. We’ll return your call soon.
Select Run to generate the speech, then listen to the result. You now have an audio version of your script, but you don’t have to settle for the first delivery.
Customize the Voice and Speaking Style
There are two different ways to change how your greeting sounds: choose another speaker voice, or give the current voice different delivery instructions.
Choose a different speaker
Open the speaker settings to explore the available voices and listen to their samples. Changing the speaker gives you a different starting voice, rather than simply asking the same speaker to sound more cheerful or more serious.
For a business greeting, I’m looking for a voice that feels approachable. For a podcast, I might choose something with a little more personality.
Describe the delivery you want
Think of style instructions as directions for a voice actor. The script tells the AI what to say. The style instructions tell it how to say it.
For a professional voicemail, I want a warm, welcoming delivery. Rather than changing the greeting itself, I can describe a gentle, conversational voice with a small smile, as though someone is greeting a customer in a friendly neighborhood store.
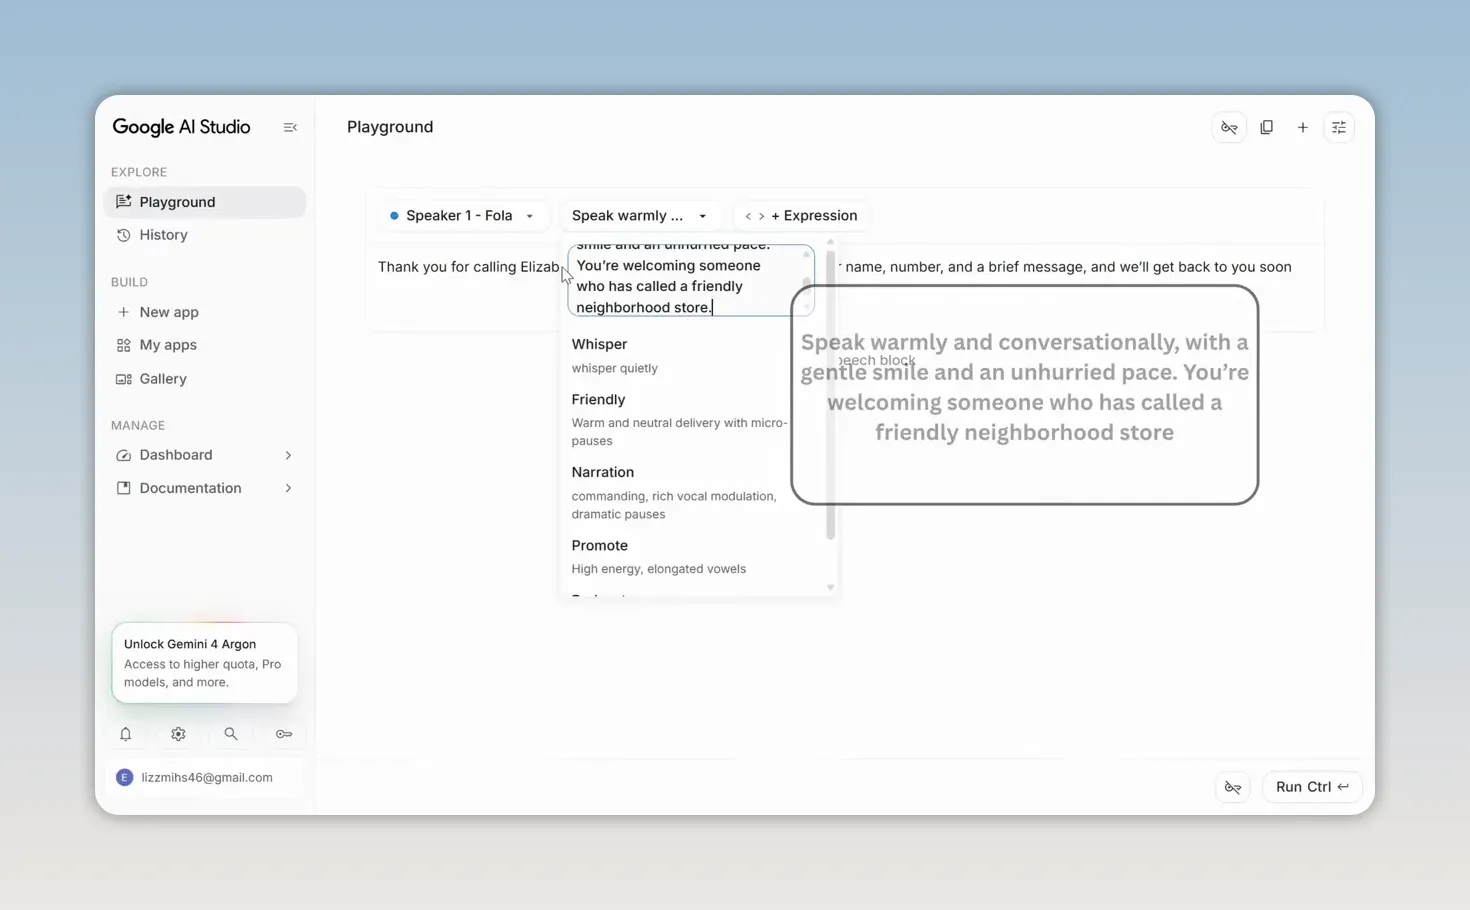
To hear how much the delivery can change, try a very different personality with the same script. An upbeat candy commercial might call for more energy, a brighter smile, and animated changes in pitch.
That comparison is useful because the words stay the same. You’re hearing the effect of the voice direction, not a rewritten message.
Generate and listen again after changing the style. Once the greeting sounds right, you can download it to your computer. The same process works for a YouTube voiceover, a training video, or a product demonstration. Just replace the greeting with your own script.
Generate a Two-Speaker AI Conversation
Now for something a little more playful: a podcast trailer for Elizabeth’s Candy Connection. Instead of one person delivering a message, we’ll create a conversation between two distinct AI speakers.
- Open a two-speaker template. This gives you a starting structure for a back-and-forth conversation.
- Assign a voice to each speaker. I choose a warm voice for the first host and a contrasting, witty podcast-host voice for the second.
- Replace the sample dialogue. Put each host’s lines into the appropriate speaker boxes.
- Add delivery instructions where useful. Each dialogue box can have its own tone.
- Select Run. Listen to how the two voices work together.
Choosing contrasting voices helps make the speakers easy to tell apart. They can both sound friendly without sounding like the same person.

Set the tone for individual lines
This is my favorite part: you can adjust the tone in each speaker box, not just choose one personality for the entire conversation.
For the opening line, I want the first host to introduce the podcast with enthusiasm, a smile in the voice, and a brisk tempo. For the second host’s response, I want animated, warm agreement that keeps the conversation moving.
- Opening host: An upbeat, enthusiastic podcast introduction with a bright vocal smile and brisk pacing.
- Responding host: Warm, animated agreement with eager conversational momentum.
You don’t have to customize every box. Use individual instructions when a line needs a particular reaction, emphasis, or change in energy.
Our trailer introduces a show about tasting new treats, revisiting childhood favorites, and debating important candy questions. Naturally, that includes whether candy corn deserves defending and whether sharing is really required.
Add Expressions and Fine-Tune the Result
The Expression button lets you add natural reactions within the dialogue. For the candy corn exchange, I initially insert a cackle before the first host defends it.
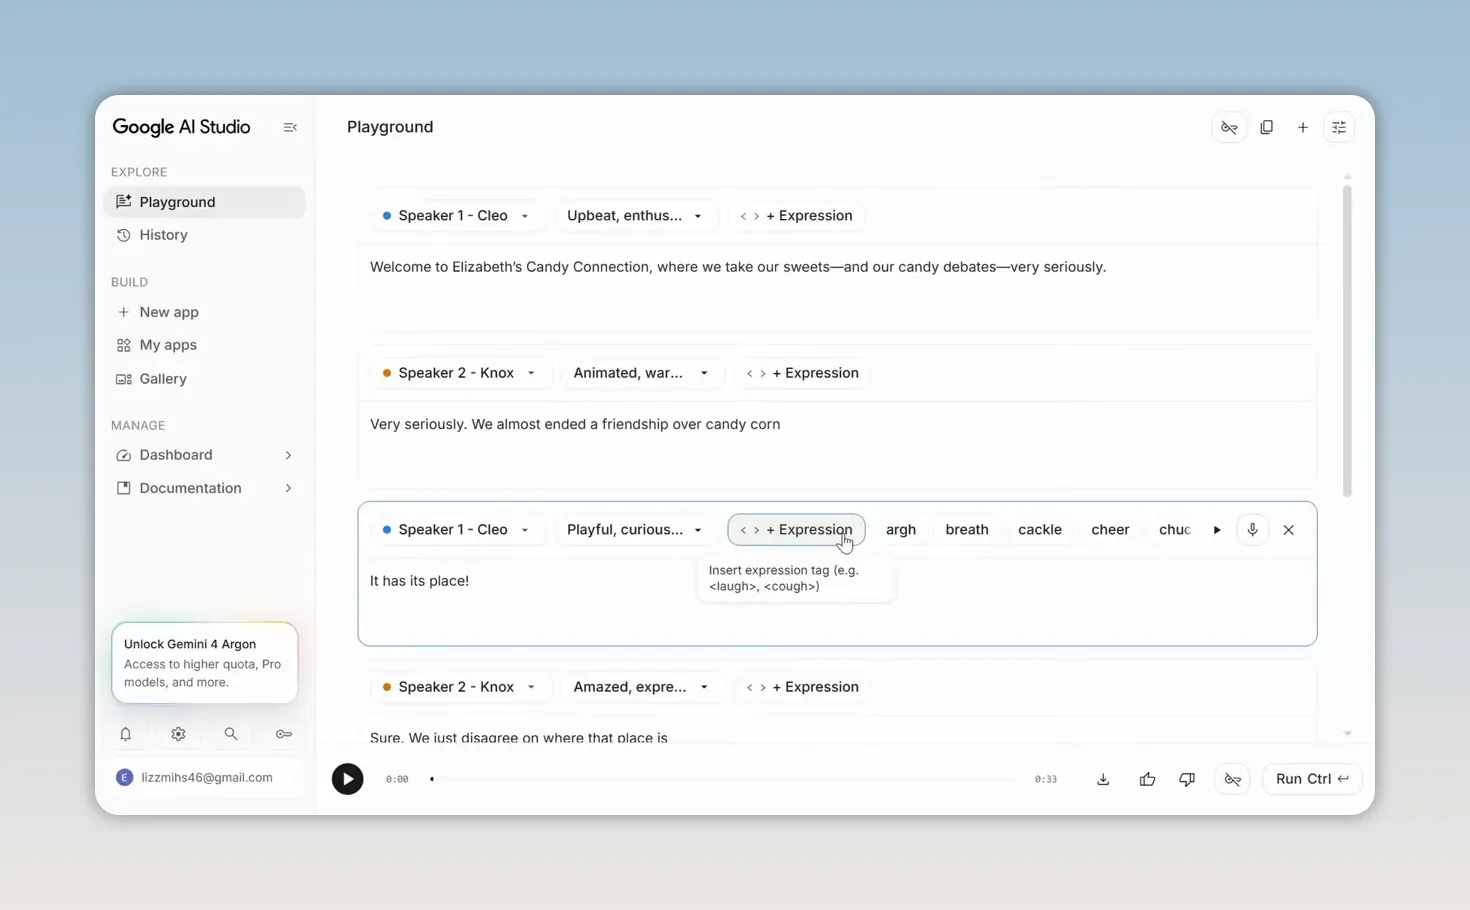
After generating the conversation, listen for more than clear pronunciation. Does the speaker sound playful, doubtful, excited, or serious in the way you intended?
Simplify instructions when the tone feels wrong
In my first version, the host’s short defense of candy corn sounds more like a question than a playful statement. The delivery instructions include curiosity and the idea of leaning into the microphone.
I remove those extra directions and leave the tone as playful. The next version is much closer to what I want.
That’s a useful adjustment to remember: more detailed instructions are not always better. If a line has the wrong emotional emphasis, simplify the direction before rewriting the dialogue.
Try a different expression
The tone is better, but the cackle still isn’t quite right. I remove it and insert a chuckle instead. That smaller reaction fits the friendly teasing between the hosts much better.
The words don’t need to change. Sometimes the difference between an awkward line and a convincing one is simply a different expression.
Choose whether to include filler words
For conversations, Google AI Studio also has an option to automatically add filler words and conversational sounds. These can include interjections such as “hmm” or “ah,” along with other small sounds that happen during a natural exchange.
Leave that option enabled if those additions suit your conversation. If you don’t want them, toggle it off.
Download Your Finished Audio
Once you’re happy with the voices, dialogue, tone, and expressions, select Run to generate the finished version, then use Download to save the audio to your computer.
Before downloading, give the result one final listen:
- Can you easily distinguish the speakers?
- Does each line have the intended tone?
- Do the expressions fit the conversation?
- Are the filler words welcome, or would you prefer them switched off?
The workflow is the same whether you’re creating a short business greeting or a two-host podcast introduction: enter the script, choose the voices, direct the delivery, listen, and refine.
Google AI Studio Free and Paid Options
You can get started with Google AI Studio’s voice generator for free, although usage limits apply. Google also offers paid options if you need to generate more audio. For current details, check Google’s official Gemini API pricing information.
Start with a short script so you can get a feel for the controls. A warm greeting is a great first project. Once that sounds right, try a two-speaker exchange and experiment with line-by-line direction. Just be prepared for your fictional hosts to have very real opinions about candy corn.


