You can use Claude Code to create and edit files without paying for an AI subscription or per-token API usage. The trick is to connect it to a free AI model running directly on your computer through Ollama.
There’s an important distinction here: Claude Code is the coding tool, while the AI model powers its decisions. This setup replaces Anthropic’s Claude models, such as Opus and Sonnet, with a local model. It does not give you free access to those Claude models.
We’ll set this up on Windows, build a playable Breakout game, and then improve it with a follow-up instruction. Ollama and Claude Code also support macOS and Linux, but the terminal instructions below use PowerShell.
What You'll Learn
- Connect Claude Code to a local Ollama model without paying subscription or per-token inference fees.
- Choose a model and context length that fit your computer’s available memory.
- Build, test, and improve a browser game using everyday-language instructions.
Table of Contents
- 1. Download and Install Ollama
- 2. Adjust Ollama’s Context Length
- 3. Install Claude Code on Windows
- 4. Create a Project Folder
- 5. Connect Claude Code to Ollama
- 6. Build a Playable Breakout Game
- 7. Improve the Existing Game
- 8. Exit and Return to Your Project
- What to Expect from Local AI Coding
1. Download and Install Ollama
Ollama lets you download and run AI models on your own computer instead of relying on a paid cloud service.
- Open the Ollama download page.
- Select Windows and copy the installation command.
- Right-click the Windows Start button and select Terminal. Make sure the active terminal is PowerShell.
- Paste the command into PowerShell. You can right-click inside the terminal to paste.
- Press Enter and wait for the installation to finish.
To confirm that Ollama installed successfully, run:
ollama --versionYou should see a version number. Once that appears, you’re ready to adjust one setting before connecting the coding tool.
2. Adjust Ollama’s Context Length
Even though you installed Ollama through the terminal, you also have an Ollama app. Open the Start menu, search for Ollama, and launch it.
Expand the sidebar in the top-left corner, then select Settings. Near the bottom, you’ll find Context length.
The context length determines how much information the model can work with at once, including your instructions and project files. A larger context window is helpful for coding because the model may need to work with several pieces of your project together.
I set mine to 64K. Keep in mind that a larger context window uses more memory, so you may need a lower setting on your computer.
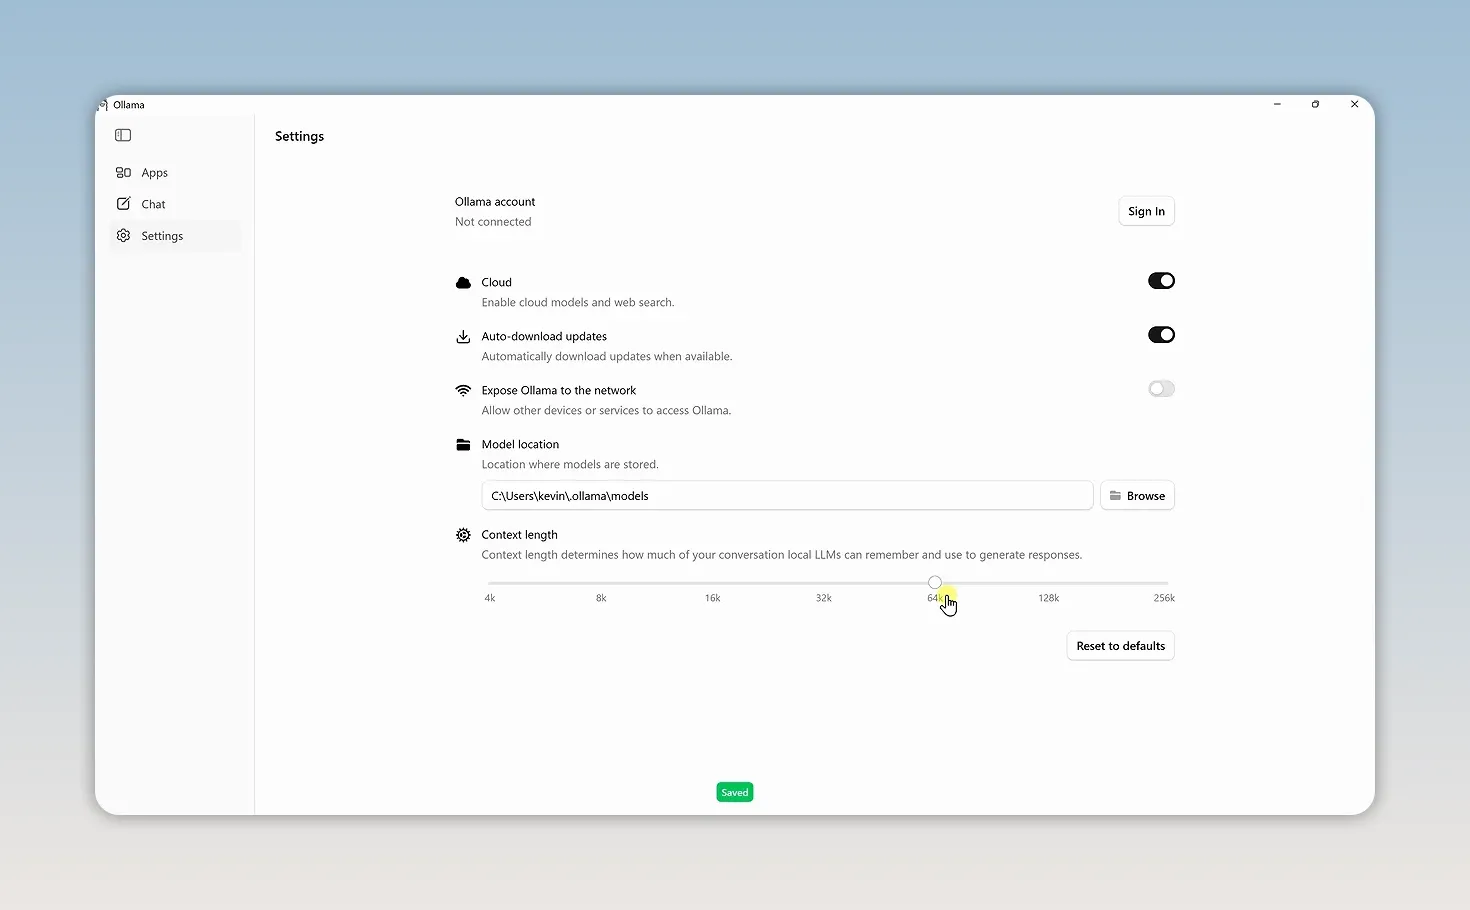
Save the setting before moving on.
3. Install Claude Code on Windows
Claude Code is the tool that can create, edit, and work with files in your project folder. To install it, open the Claude Code website, select the terminal option, and find the Windows PowerShell installation instructions.
Copy the installation command, paste it into PowerShell, and press Enter. When the installation finishes, check it with:
claude --versionJust like with Ollama, you should see the installed version number.
Fix “claude is not recognized” on Windows
If Windows doesn’t recognize the command, you may need to add Claude Code’s installation folder to your PATH. That’s the list of folders Windows checks when you enter a command.
For a native installation, run this command to update the current PowerShell window:
$env:Path += ";$env:USERPROFILE\.local\bin"To save the change for future terminal sessions, run these three lines separately:
$claudeBin = Join-Path $env:USERPROFILE '.local\bin'
$userPath = [string][Environment]::GetEnvironmentVariable('Path', 'User')
if (($userPath -split ';') -notcontains $claudeBin) { [Environment]::SetEnvironmentVariable('Path', ($userPath.TrimEnd(';') + ';' + $claudeBin).TrimStart(';'), 'User') }
Restart Windows Terminal after saving the change, then run claude --version again. For additional installation help, use the official Claude Code setup documentation.
4. Create a Project Folder
Before launching Claude Code, give it a folder where it can save the files it creates. We’ll call this project breakout-game, but you can use a different name for your own project.
In PowerShell, create the folder:
mkdir breakout-gameThen change into it:
cd breakout-gameStart Claude Code from inside your project folder. Files it creates will be saved there by default, which makes it easy to find and reopen your work.
5. Connect Claude Code to Ollama
With both tools installed and your terminal inside the project folder, run:
ollama launch claudeOllama will display a selection of models you can use with Claude Code. Some options run in the cloud and have names ending in cloud. For this setup, choose a local model, not a cloud option.
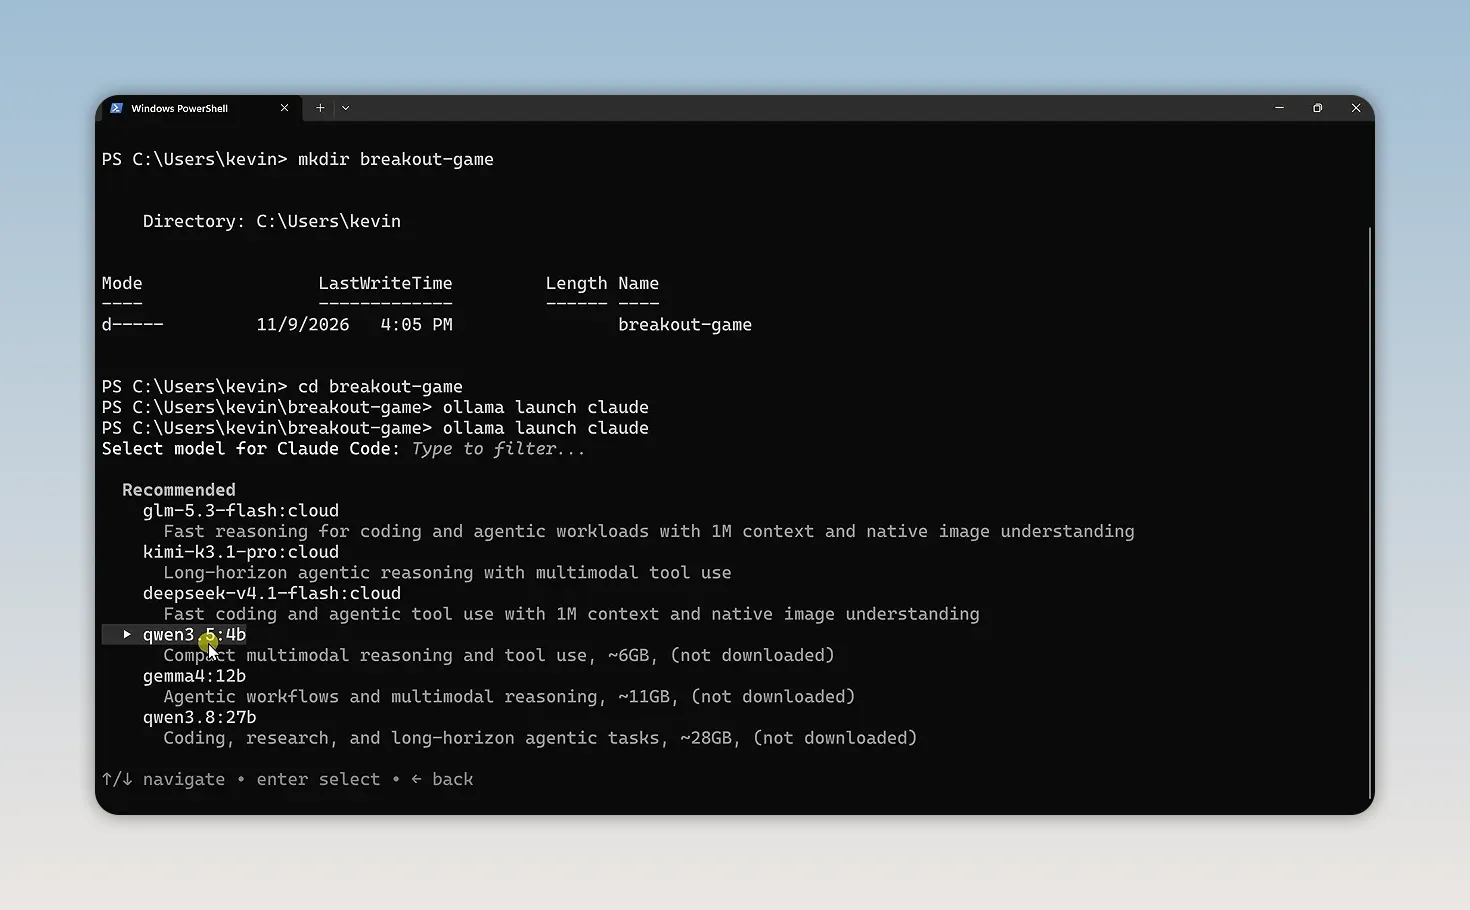
Choose a model that fits your computer
Generally, smaller models are easier to run on less powerful computers. Larger models tend to be more capable, but they also require more memory.
- Gemma 4 12B: This is the Google model I used. It worked well for building and improving the Breakout game. You can find details on the Gemma 4 12B model page.
- Qwen 3.5 4B: A smaller option to try if your computer is less powerful. Results may vary. See the Qwen 3.5 4B model page.
Select your model and press Enter. Ollama downloads it, and Claude Code launches when the download finishes. For more details about the connection between the two tools, refer to Ollama’s Claude Code integration guide.
Complete the initial setup prompts. I chose dark mode. When Claude Code asks whether you trust the folder, confirm the project folder you just created.
You now have Claude Code running with a local AI model. You can type instructions in everyday language, and the tool will use that model to create and edit your project files.
6. Build a Playable Breakout Game
A small browser game is a fun way to test the setup. It gives you something concrete to open, play, and improve.
Enter an instruction like this into Claude Code:
Build a colorful Breakout arcade game that runs in a web browser using HTML, CSS, and JavaScript. Add a mouse-controlled paddle, a bouncing ball, bricks that disappear when struck, a score display, and a button to restart the game.
This gives the model a clear target: the technologies to use, the game mechanics, and the controls. Press Enter and let Claude Code create the files.
Open and test the game
When it finishes, open your breakout-game folder in File Explorer. You’ll see the files Claude Code created.
Double-click index.html to open the game in your browser. In my result, I could move the paddle with the mouse, bounce the ball, and break colorful bricks to earn points. A restart button appeared below the play area.
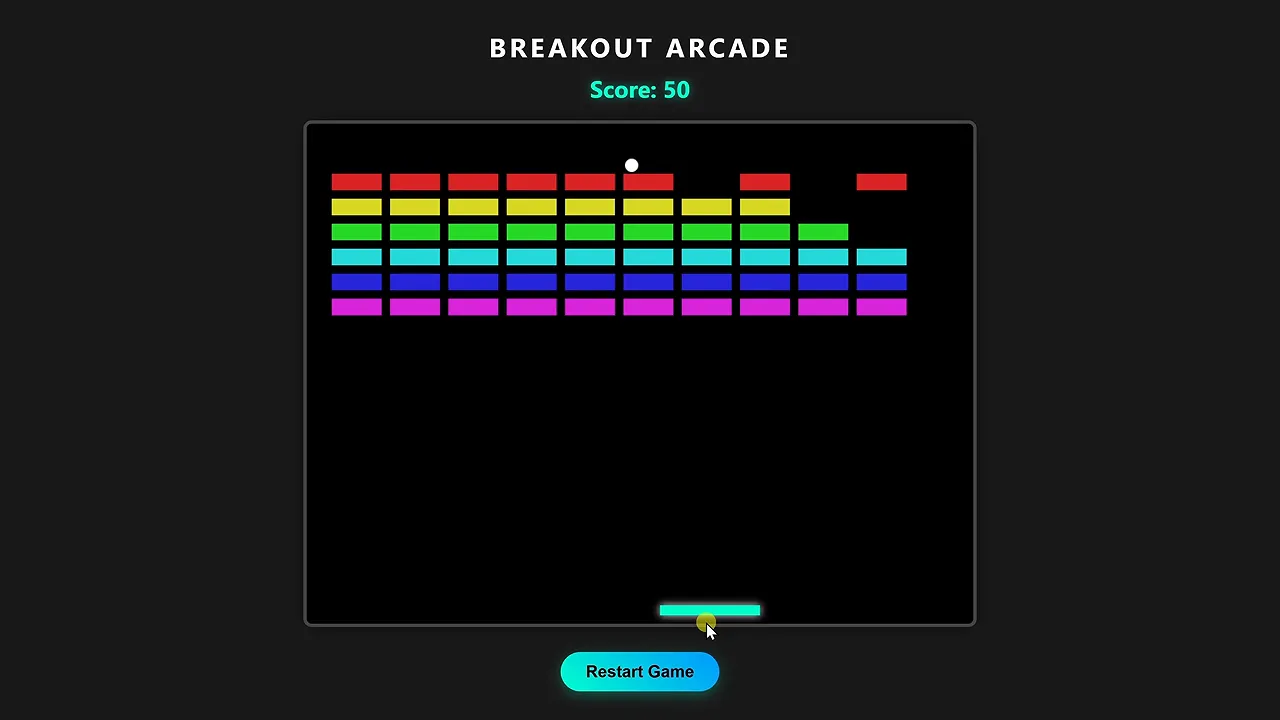
Not bad for a game built from a plain-language instruction using a free local AI model.
7. Improve the Existing Game
The first version works, but it could look a little more polished. You don’t need to start over. Claude Code can review the existing project files and make changes to them.
Back in the terminal, enter a follow-up instruction like this:
Polish the existing Breakout game with a glowing ball, particles that burst out when bricks break, and a subtle animated background. Preserve the current gameplay.
Make it clear that you want to improve the existing project and keep its functionality. That focuses the request on visual changes rather than building something new.
On my computer, this update took about 24 seconds. Your timing will depend on your hardware and the model you selected.
When Claude Code finishes, return to the browser and refresh the page. My updated game had a glowing ball, particles when bricks broke, and a more atmospheric background.
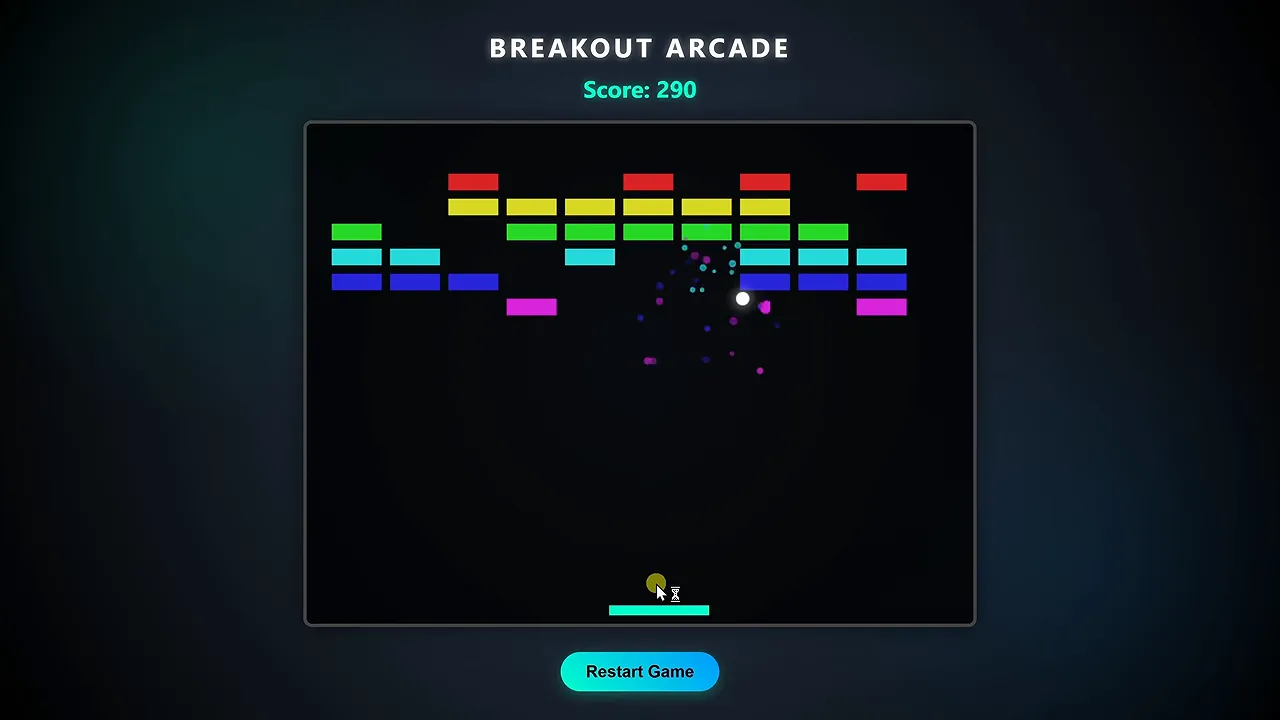
That’s the useful workflow here: create a working version, test it, then ask for a specific improvement.
8. Exit and Return to Your Project
When you’re finished working in Claude Code, enter:
/exitPress Enter to return to the regular terminal.
To work on the project again later, navigate to its folder in PowerShell and run the same launch command:
ollama launch claudeSelect your model, and Claude Code opens again. Your project files remain in the folder, so you can continue working on them.
What to Expect from Local AI Coding
This setup removes the AI subscription and per-token API charges for local inference, but there are trade-offs.
- Performance depends on your hardware. The model runs on your computer, so generation speed and available memory matter.
- Context length affects memory use. A 64K context window can be useful, but a lower setting may be more practical on your machine.
- Local models have capability limits. Gemma 4 may not match Anthropic’s Claude models, particularly on more complex projects.
- Experimentation helps. You may need to adjust your instructions or try another model to get the result you want.
For this project, a local model was enough to build a playable game and then improve its appearance, all through Claude Code. You still get the file-creation and editing workflow, just with a different model doing the thinking. That’s pretty cool.


