Can ChatGPT take a folder of raw video clips and turn it into a finished video without being told where to make every cut? That’s exactly what I wanted to test.
I started with 16 unedited clips showing how to make chocolate chip cookies, totaling about three and a half minutes of footage. Normally, I’d bring those files into DaVinci Resolve, trim the clips, arrange them, and add text overlays, captions, and music. This time, I handed the folder to ChatGPT Codex and described the result I wanted.
The result was a video under a minute long, complete with ingredient callouts, captions, and background music. Then I used voice feedback to add an AI-generated opening graphic. Here’s how to set up that workflow and refine the result.
Disclosure: OpenAI sponsored this tutorial. I’ll explain what I asked Codex to do, what it produced, and why I’d still review the finished video before publishing.
What You'll Learn
- Connect a local footage folder to a Codex project and install Hyperframes for video editing.
- Define the format, pacing, captions, and audio while letting Codex make individual editing decisions.
- Use focused voice feedback to revise the video without changing the rest of the edit.
- Review the rendered result before publishing, even when the first AI edit looks polished.
Table of Contents
- 1. Set Up Codex in the ChatGPT Desktop App
- 2. Install the Hyperframes Plugin
- 3. Create a Project and Connect Your Raw Footage
- 4. Give Codex an Editing Brief, Not a Cut List
- 5. Review the First AI Edit
- 6. Refine the Video Using Voice Feedback
- What ChatGPT Codex Handled, and What Still Needs You
1. Set Up Codex in the ChatGPT Desktop App
Start by installing the ChatGPT desktop app, which is available for Windows and Mac. Sign in with your ChatGPT account, then select Codex from the left side of the app.
Why use Codex instead of a regular ChatGPT conversation? For this project, we’re working with an entire folder of local video files. We need the AI to analyze those files, build a project, render a video, check the result, and make revisions.
That’s a longer, multistep task, which is the kind of work Codex is designed to handle. Rather than just discussing editing choices, it can carry out the project workflow.
There is one important difference from a traditional video editor: Codex doesn’t give you a conventional editing timeline like DaVinci Resolve or Adobe Premiere Pro. To give it the specialized video tools it needs, we’ll install a plugin.
2. Install the Hyperframes Plugin
Plugins extend Codex with additional tools and specialized instructions. For this project, I used Hyperframes by HeyGen.
- Open Plugins in Codex.
- Search for Hyperframes.
- Find the Hyperframes plugin and select the install option.
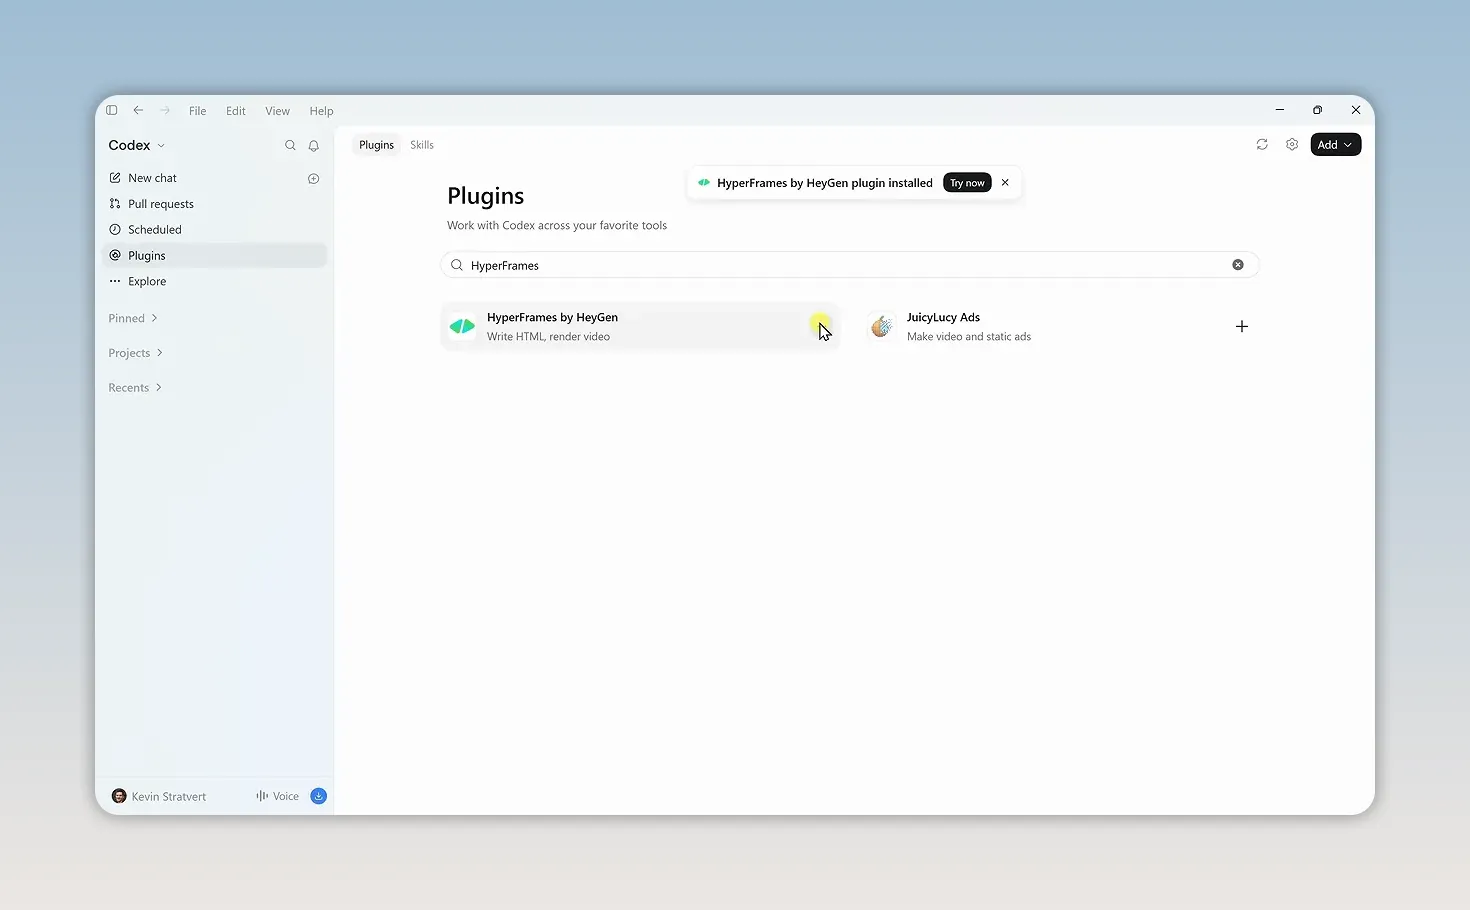
Hyperframes supplies tools and instructions for working with video, audio, captions, graphics, and animations. It also lets Codex render those elements into a finished video.
Think of the roles this way: Codex handles the multistep task and editing decisions, while Hyperframes provides the video-specific capabilities used to build and render the result.
3. Create a Project and Connect Your Raw Footage
Next, create a project that points to the folder containing your source clips.
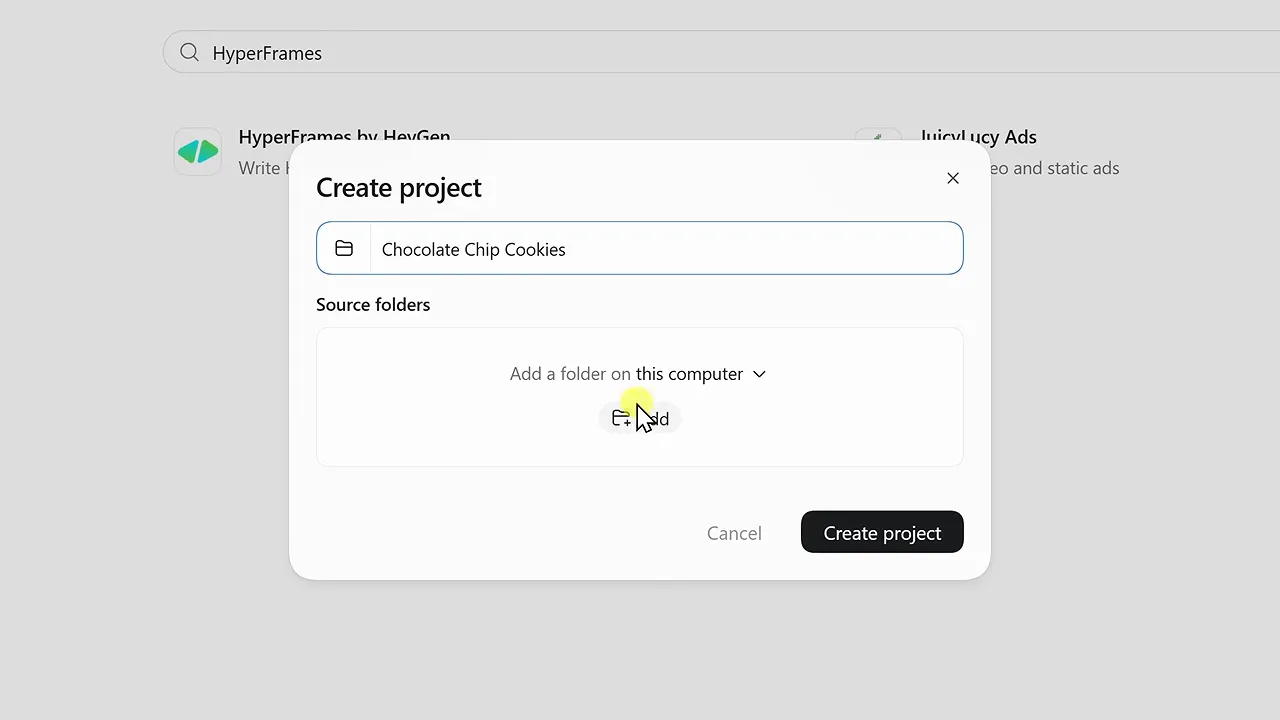
- Hover over Projects in the left sidebar and select the plus icon.
- Enter a project name. I used Chocolate Chip Cookies.
- Under Source folders, select Add.
- Choose the folder containing your raw video files, then select Select Folder.
- Select Create Project, then confirm Trust Folder when prompted.
- Expand Projects, open the new project, and start a new chat.
If you’d like to use the same footage, you can download the practice video files.
These clips were completely unedited. They included pauses, extra footage, and separate cooking steps that hadn’t been assembled into a story. I also deliberately left the files unlabeled and unorganized.
That was part of the test. I wanted to see whether Codex could identify what was happening in each clip and figure out a sensible order without me preparing a detailed edit plan.
4. Give Codex an Editing Brief, Not a Cut List
The initial prompt matters because it defines the finished video. But you don’t have to specify every cut, transition, or clip placement.
I kept my instructions high level while being specific about the outcome: a vertical cookie-making video under 60 seconds, suitable for YouTube Shorts and Instagram Reels.
Here’s an adaptable version of the editing brief I used:
Turn the raw footage in this project into a polished vertical tutorial about making chocolate chip cookies. Keep the finished video under 60 seconds and format it for YouTube Shorts and Instagram Reels.
Open with a compelling hook and maintain an engaging pace. Choose the best footage, trim pauses and unnecessary material, and organize the cooking process into a clear sequence. Preserve the original spoken audio.
Add ingredient names and quantities as on-screen callouts when each ingredient appears. Include readable, mobile-friendly captions, useful graphics, and background music that supports rather than competes with the dialogue.
Make the editorial decisions about cuts, timing, transitions, and visual presentation. Use Hyperframes to build and render the finished video.
This gives Codex several concrete requirements:
- Format and duration: Vertical video, under one minute.
- Story and pacing: A strong opening followed by a clear step-by-step process.
- Audio: Preserve the original speech and keep music behind the dialogue.
- Text: Add captions and ingredient callouts.
- Creative freedom: Let Codex choose the footage, cuts, and presentation.
Explicitly mention the plugin
Before sending the prompt, type @ and select Hyperframes by HeyGen from the available options. This inserts the plugin mention into your request so Codex knows which plugin to use.
Then send the prompt and let it work. This is a substantial task: Codex needs to analyze the footage, decide what to keep, sequence the clips, build the video, and render it through Hyperframes. It isn’t an instant response.
5. Review the First AI Edit
For a first pass, the result was really impressive. All I supplied was a folder of 16 raw, unlabeled clips and a description of the finished video.
Codex worked out the cooking sequence and reduced roughly three and a half minutes of footage to under a minute. It also added ingredient callouts, captions, and background music.
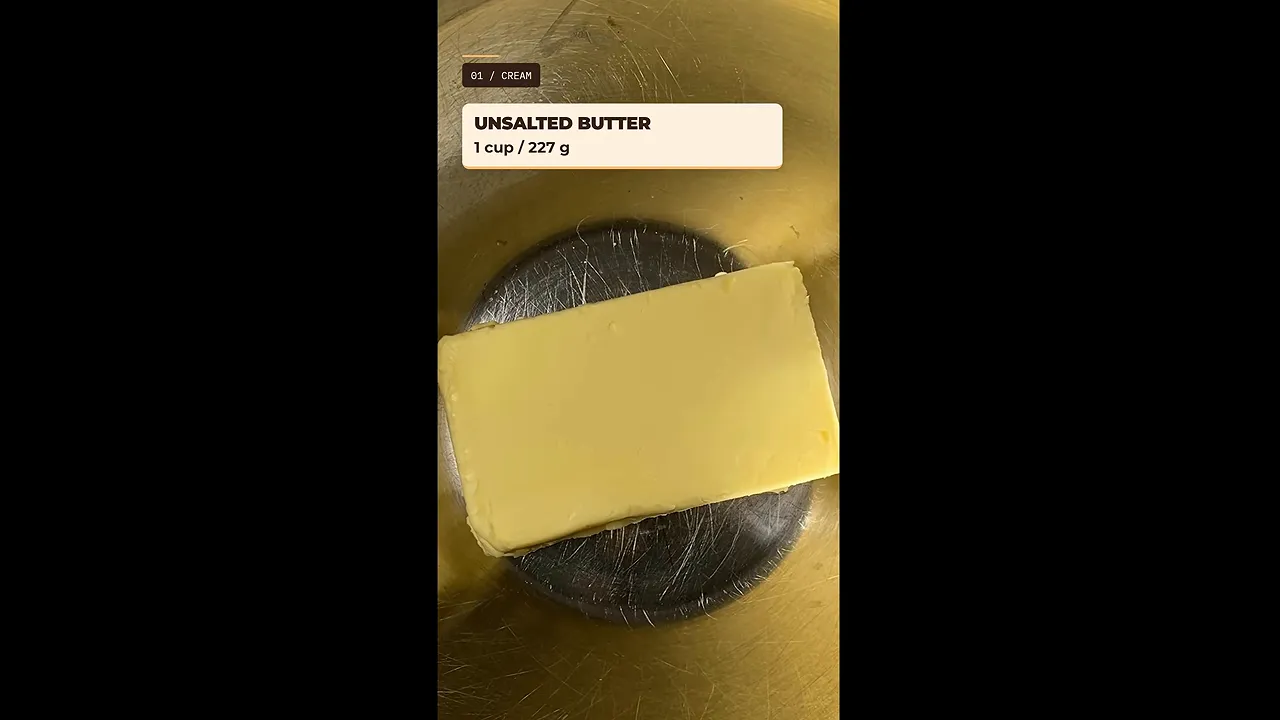
The important part wasn’t simply that it shortened the footage. It understood the story well enough to turn separate clips into a coherent tutorial, with text appearing alongside the relevant cooking steps.
Still, a good first pass isn’t the same as a final approval. As you review your own result, check it against the brief:
- Does the sequence make sense from beginning to end?
- Are the cuts tight without losing important instructions?
- Do ingredient labels and amounts match the footage?
- Are captions readable and accurate?
- Can you clearly hear the dialogue over the music?
In my case, I liked the edit but wanted a stronger opening graphic. That gave me a useful opportunity to test a targeted revision without rebuilding the whole video.
6. Refine the Video Using Voice Feedback
You don’t have to type every follow-up instruction. I selected Start voice chat and described the change I wanted while working in the project.
My request was to use ImageGen to create a thumbnail-style opening graphic featuring the finished chocolate chip cookie, with the title The Best Chocolate Chip Cookies. Then I asked Codex to use Hyperframes to insert it briefly at the beginning of the existing video.
The key constraint was to leave everything else unchanged.
For this edit, Codex confirmed that it would:
- Use a finished-cookie frame as the image reference.
- Generate the opening graphic with the requested title.
- Limit the graphic to the first two video frames.
- Keep the existing timing and audio intact.
Notice that this was two frames, not two seconds. It was a very brief opening insert, rather than a title sequence that delayed the rest of the video.
Codex generated the graphic, checked the two-frame insertion, and rendered an updated version. It also kept the previous export available.
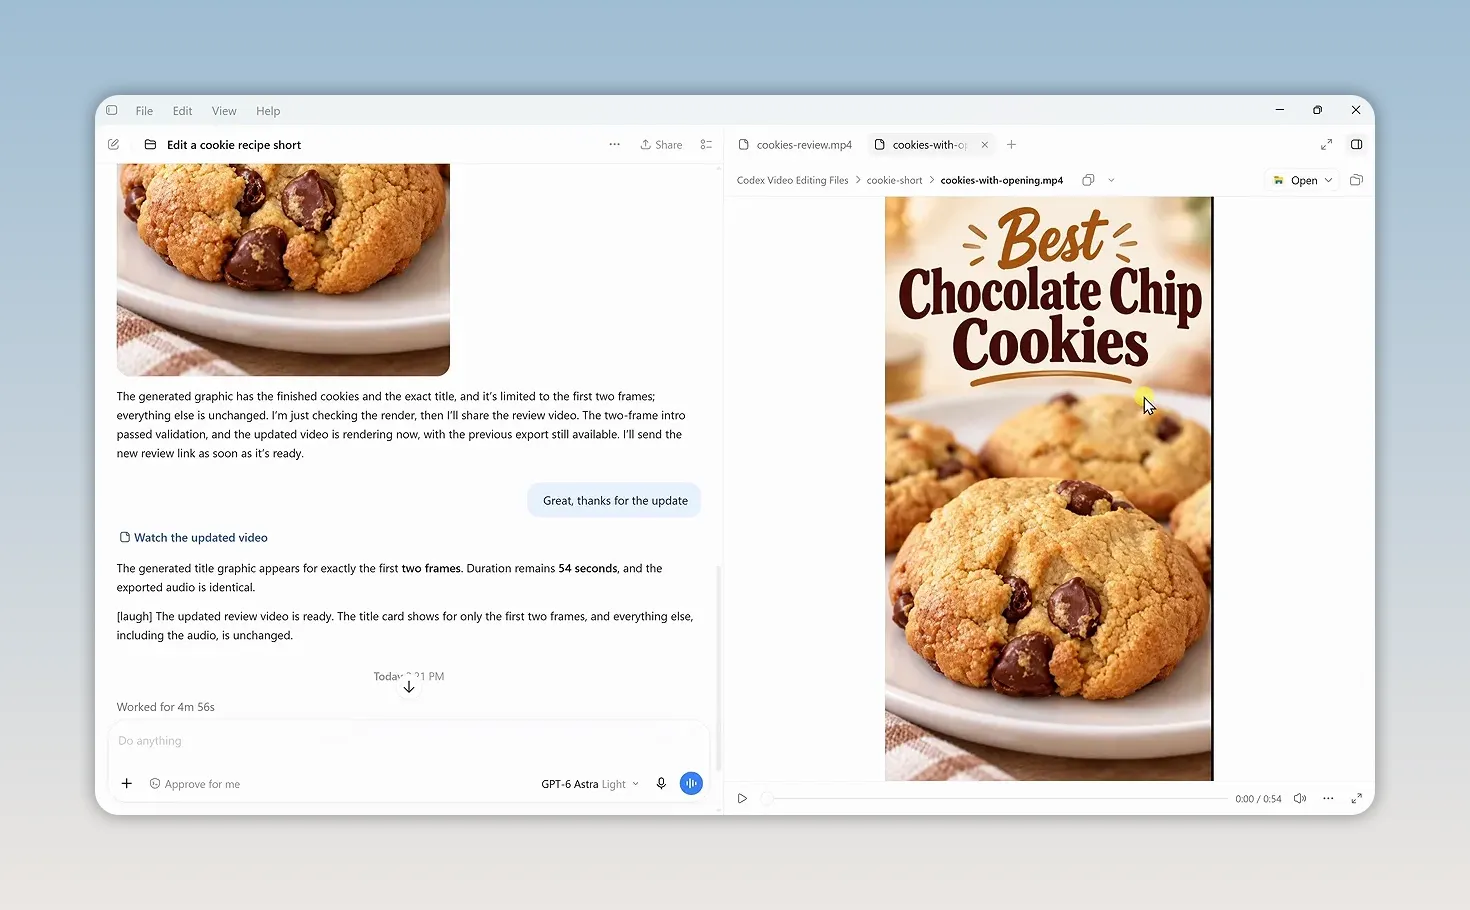
The updated graphic looked good and matched the requested wording. Playing the revised video confirmed that it moved straight into the existing edit.
This is a useful way to refine an AI edit: describe the specific change, identify the tool you want used when relevant, and clearly state what should stay the same.
What ChatGPT Codex Handled, and What Still Needs You
Across this project, Codex handled a surprising amount of the editing process on its own. It interpreted the raw footage, selected and sequenced clips, trimmed the runtime, added text and captions, brought in music, and created an opening graphic through a follow-up request.
I didn’t tell it where to make every cut or how to arrange each clip. That’s what made the result interesting: it wasn’t just carrying out a detailed edit list. It was making editorial decisions from a brief.
There’s still plenty I could refine, and I would always review the complete video before publishing. This experiment doesn’t mean every project will be finished after one prompt. It does show how much of the initial editing work Codex and Hyperframes can take on, leaving you to evaluate the result and give focused feedback.
For creative projects with a folder full of raw clips, that could save a lot of time.
To try this workflow yourself, start with the ChatGPT desktop app.


