You don’t need a subscription or a cloud AI service to chat with AI, analyze documents, or get help building a website. With Ollama, you can run AI models directly on your own computer for free.
The big benefit is that your prompts and documents can stay on your computer when you use a local model. Once that model is downloaded, you can even use it without an internet connection.
We’ll set up Ollama on Windows 11, try a conversation, analyze a PDF, and then connect it to OpenCode so the AI can create actual website files on your PC.
What You'll Learn
- Set up Ollama locally without creating an account or paying for a subscription.
- Choose a downloadable model to keep AI processing on your own computer.
- Use local AI for conversations and PDF analysis, even offline after downloading the model.
- Connect Ollama to OpenCode to create website files directly in a local project folder.
Table of Contents
- 1. Download and Install Ollama
- 2. Choose a Local AI Model
- 3. Send Your First Prompt and Refine the Answer
- 4. Analyze a PDF Locally
- 5. Connect Ollama to OpenCode
- 6. Build a Website with Local AI
1. Download and Install Ollama
Ollama is available for Mac, Linux, and Windows. For this walkthrough, I’m using Windows 11.
- Open the Ollama download page for Windows.
- You’ll see a PowerShell installation command, but you don’t need to use it. Select Download manually to get the installer.
- Open the downloaded installer and follow the installation steps.
- On the welcome screen, select Continue.
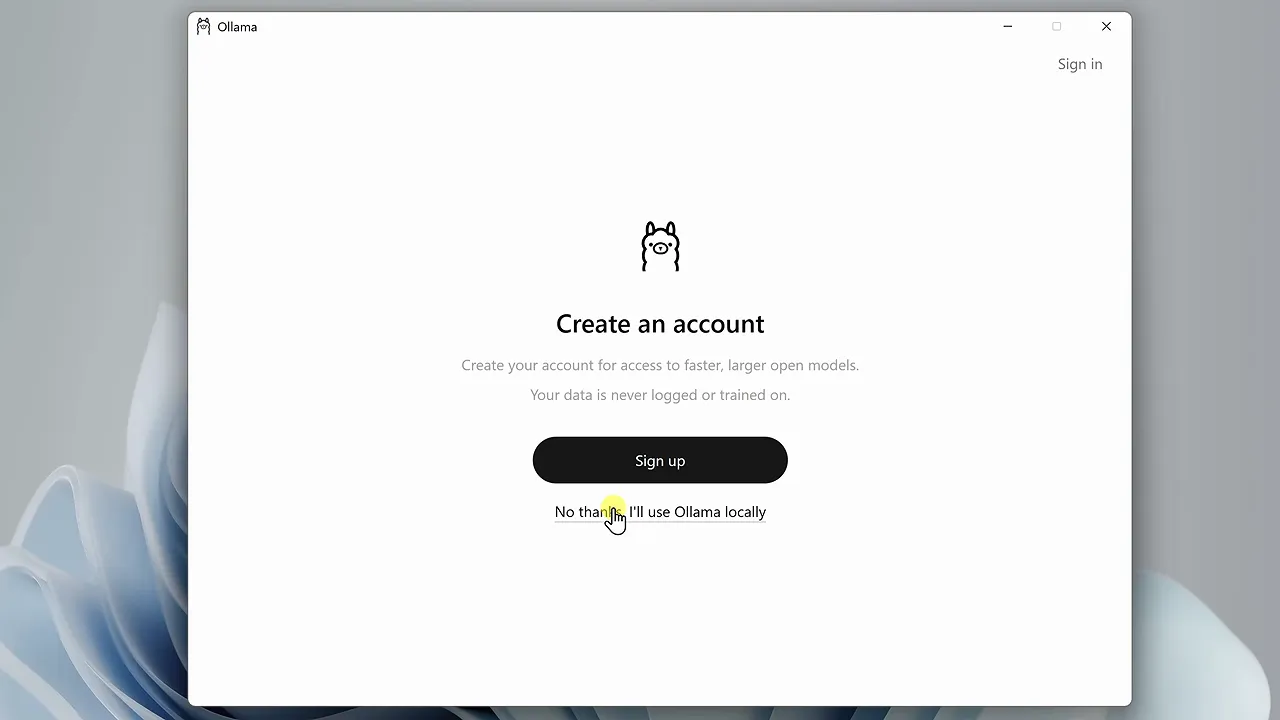
- When Ollama asks you to create an account, choose No thanks, I’ll use Ollama locally.
An account gives you access to cloud models, but we’re keeping the AI on our own computer. You don’t need an account or a subscription for this local setup.
If you land on a screen asking you to run a command in a terminal, simply close Ollama and reopen it from the Windows Start menu. That brings you into the main app.
Ollama may initially open to the Apps page. This is where you can connect it to applications such as Claude Code, Codex, and OpenCode. We’ll use one of those integrations later. For now, open the sidebar in the upper-left corner and select New chat. You can close the sidebar again to give the conversation more room.
2. Choose a Local AI Model
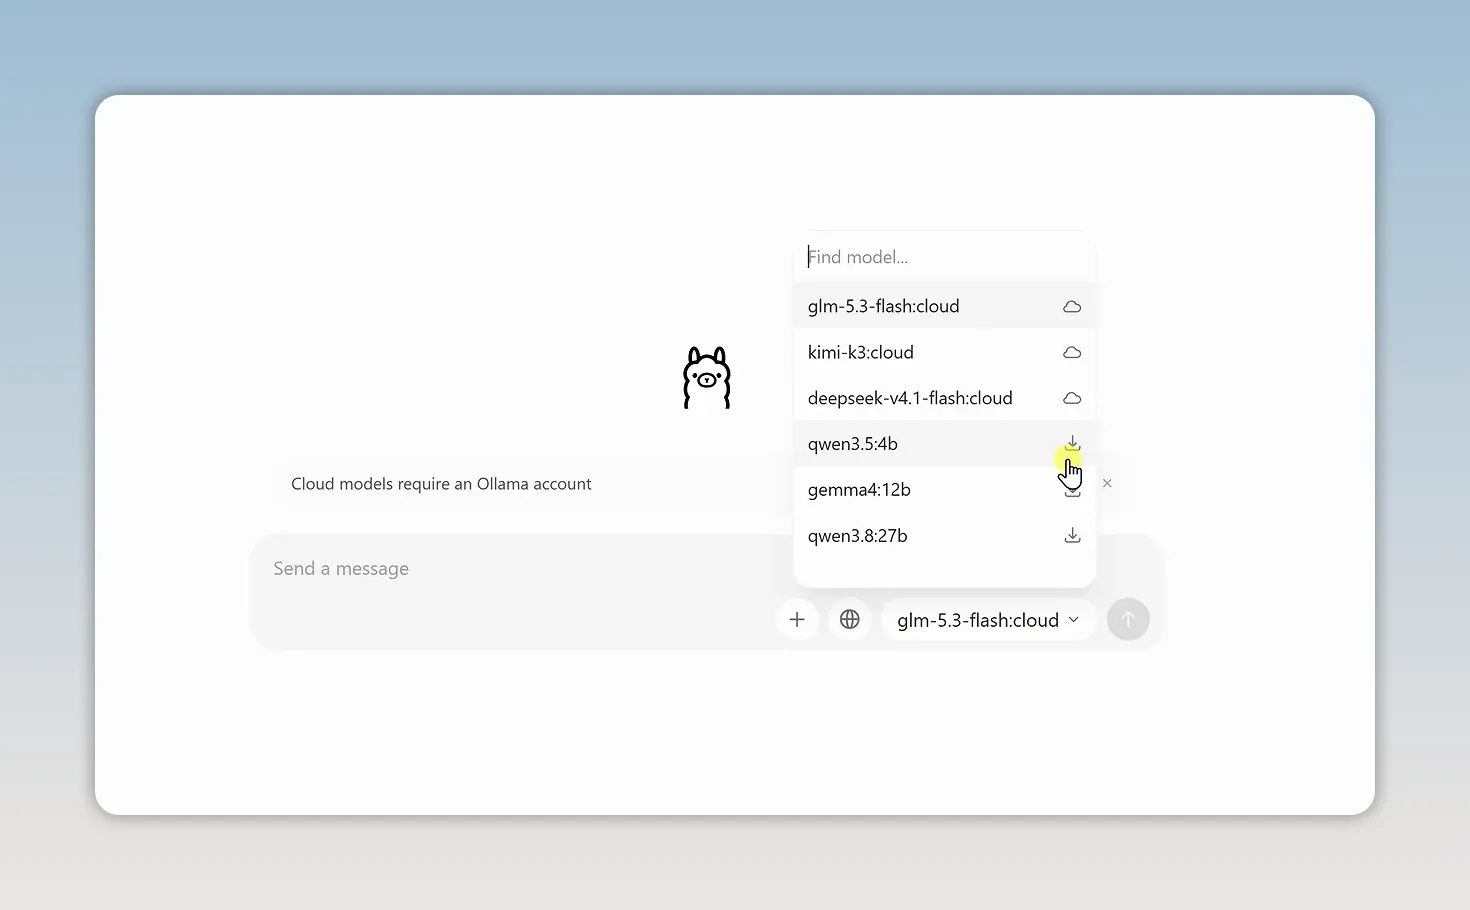
Before you send a message, check which model is selected. In my setup, Ollama initially selected a cloud model. Installing Ollama alone doesn’t mean every model in the app runs locally.
Open the model dropdown and look at the icons:
- Cloud icon: The model runs on remote servers and requires an account.
- Download icon: The model can be downloaded and run directly on your computer.
Start with a smaller model
I’m choosing Qwen 3.5 4B, a model developed by Alibaba. It’s a good starting point because it’s smaller, faster, and works on a wider range of computers. You don’t need the most powerful PC to start experimenting.
The trade-off is that a smaller model may struggle with more complex requests. Larger options, such as Gemma 4 and Qwen 3 8B, can handle more demanding tasks, but they also need more memory and processing power.
For your first attempt, start small. You can get familiar with the workflow before trying a more demanding model.
3. Send Your First Prompt and Refine the Answer
With Qwen 3.5 4B selected, enter a request in the message box. I’m using a cookie shop example:
I’m opening a new cookie shop. Suggest three creative, low-cost ways to attract customers during the first week.
Select Send. The first time you use the model, Ollama downloads it before generating an answer. That initial download requires an internet connection. Afterward, the model runs on your computer.
Once the response appears, you’ve run your first local AI prompt. No cloud AI usage fees involved.
Use follow-up questions instead of starting over
The first answer might be more detailed than you need. Rather than repeating your original request, ask for a different format:
Condense those three ideas into short bullet points, using one sentence for each idea.
Ollama uses the earlier messages in the same conversation, so it knows which ideas you mean. In my example, this shorter response took about five seconds, though response times depend on your computer and the model.
This is a useful way to work with AI: make an initial request, then refine the result. You don’t have to fit every instruction into the first message.
Find saved conversations
Ollama also saves your chats so you can return to them later. Open the sidebar in the upper-left corner to find your conversation history, then select a previous chat to pick up where you left off.
When you’re ready to switch topics, select the New chat icon to start a separate conversation.
4. Analyze a PDF Locally
Ollama isn’t limited to answering questions you type. You can also give it a document to analyze.
For this example, I have a PDF containing customer feedback for my small business, the Kevin Cookie Company. I want to turn that feedback into a short list of problems and practical improvements.
- Start a new chat and confirm that your local model is selected.
- Drag the PDF from your computer into the Ollama conversation.
- Enter a request explaining what you want to learn from the document.
- Select Send.
Here’s the request I’m using:
Find the three most common customer complaints in this feedback and suggest one improvement for each.
Ollama analyzes the document using the model running on my computer. The resulting answer identifies recurring complaints, refers to specific customer comments, and recommends a way to address each issue.
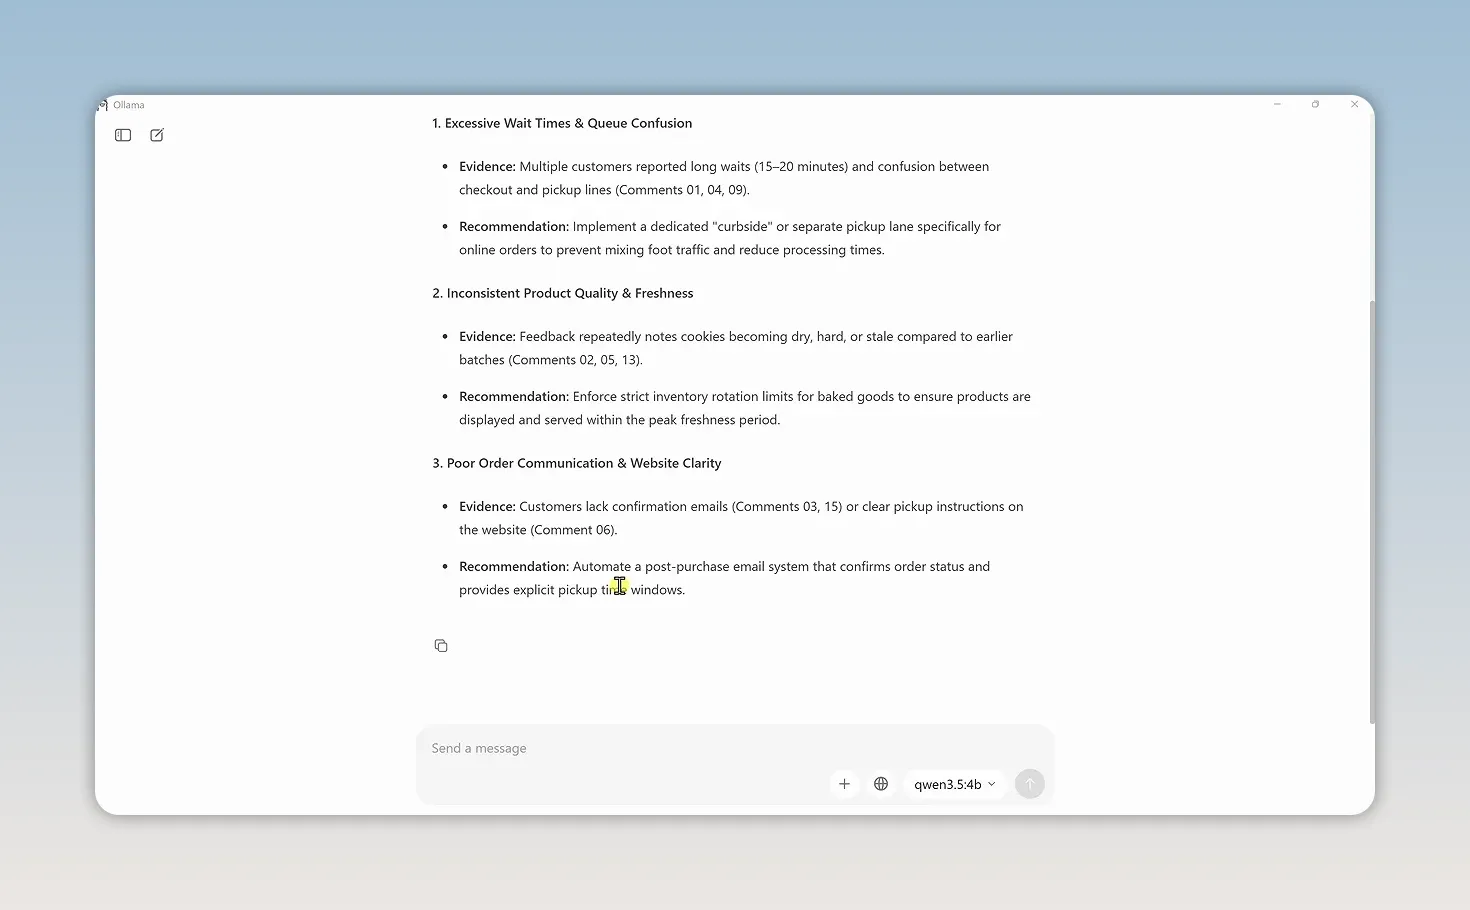
This is especially useful for files you don’t want to send to a cloud AI service. With the local model selected, the document analysis happens on your computer rather than on a remote AI server.
And once you’ve downloaded the model, you can use it offline. The important distinction is the model you choose: cloud models still work differently and aren’t part of this local workflow.
5. Connect Ollama to OpenCode
Chatting and analyzing documents are useful, but we can take this a step further. By connecting Ollama to another application, we can give the AI tools to create and edit files on the computer.
For that, I’m using OpenCode, an AI coding assistant that can help build websites and applications.
Install OpenCode and choose a project folder
- Open the OpenCode download page.
- Find the desktop app and select the download for your operating system. I’m choosing Windows.
- Download, install, and open the app.
- Use the project control to change projects or create a new one.
- Choose the folder where OpenCode should work with your files.
That project folder matters because this workflow produces actual files. It isn’t just a place to keep a conversation.
Select your Ollama model
Open the model selector in OpenCode. In this setup, OpenCode automatically detects Ollama and the model we already downloaded. Select Qwen 3.5 4B, the same model used for the earlier chat and document analysis.
Here’s how the two applications work together:
- Ollama runs the AI model locally.
- OpenCode gives that model tools to create and edit files in your project.
The model provides the AI capability, while OpenCode lets it do something practical with the result.
6. Build a Website with Local AI
Now we can put that connection to work. In OpenCode’s prompt field, ask it to create a website with the sections you need.
I’m sticking with the cookie business:
Build a website for the Kevin Cookie Company. Include a cookie menu with prices and a contact section.
Send the request. OpenCode uses Qwen running locally through Ollama to create the website files in the project folder.
Once it finishes, open Windows File Explorer and navigate to that folder. In this example, there’s an index.html file. Double-click it to open the website in your browser.
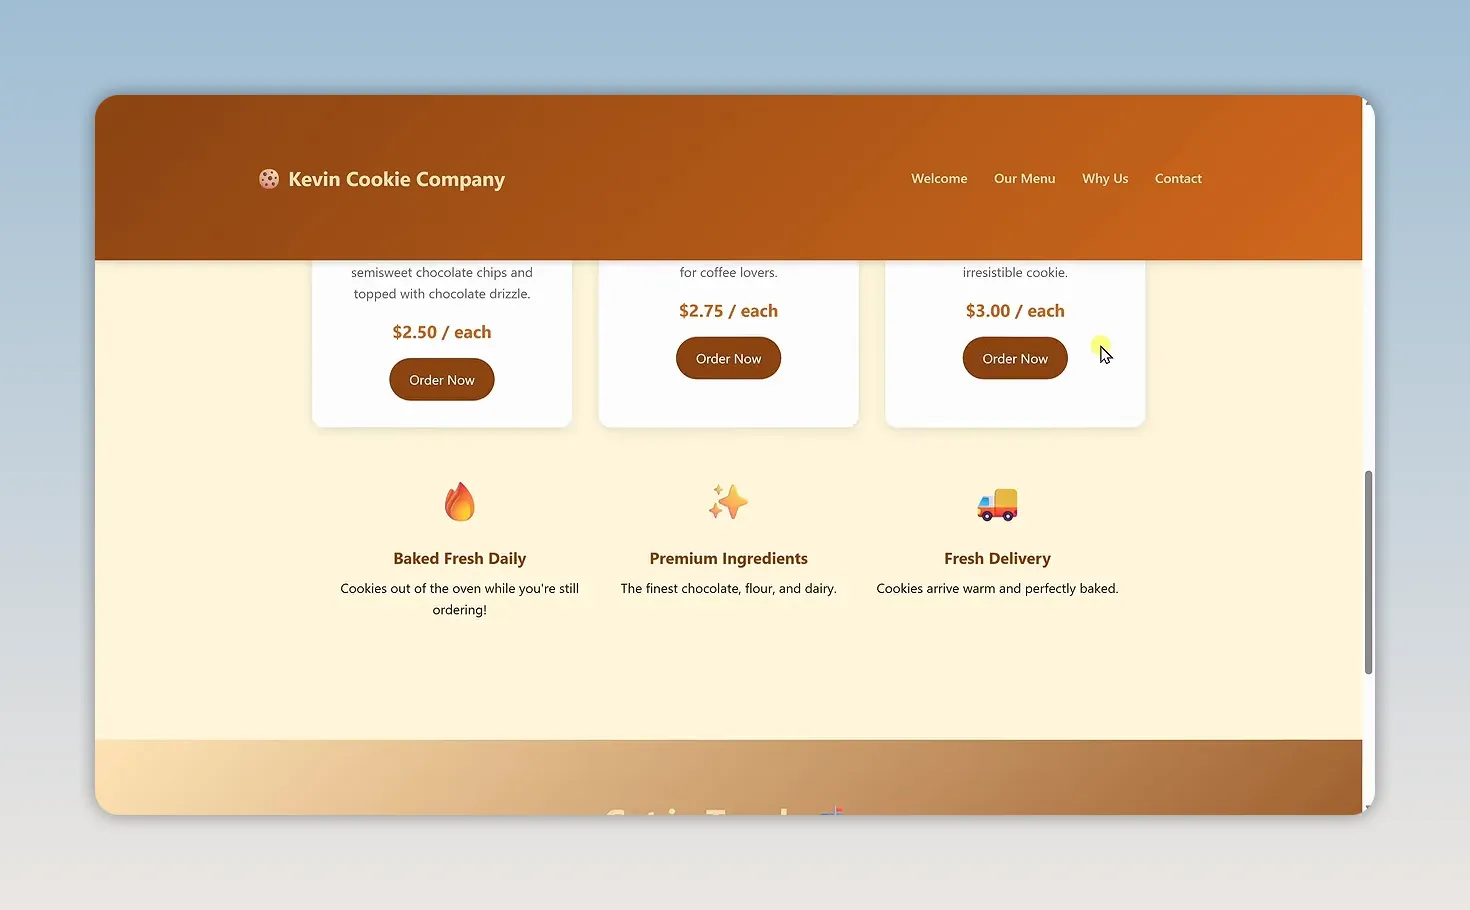
The result is a working website with the requested cookie menu, pricing, and contact section. The especially cool part is that the AI didn’t just put code into a chat response. It created actual files on my computer.
We used the same local model for brainstorming, document analysis, and website creation, without paying for AI usage. That’s a pretty useful starting point for local AI: one tool to run the model, a chat interface for everyday requests, and an integration when you want the AI to work with files.


