Have a printed document that you want to edit without typing everything again? You can take a photo of the page and use Microsoft Word to turn the text into something you can work with.
The trick is a little roundabout: put the image into Word, save it as a PDF, and then open that PDF in Word. Simply inserting a picture does not make its text editable. The PDF conversion is the important extra step.
I’ll use a photo of a Seattle Democracy Voucher mailing as an example. The goal is to recover the words so we can edit them, not recreate every detail of the original design.
What You Need
- Microsoft Word on your computer. The steps below use the desktop application.
- A photo of a printed document. A smartphone works, but any camera will do.
- The image file saved on your computer. This example uses a JPEG.
You do not need a separate conversion application for the workflow demonstrated here. Keep in mind that Word’s conversion results can vary, and the finished document may not look exactly like the original.
1. Take a Photo and Transfer It to Your Computer
Take a picture of the page you want to convert, then get that photo onto your computer. Once it is there, open the image to confirm that you have the right document and can read the text.
For my example, the mailing includes a short heading, a web address, three numbered sections, and a questions area at the bottom. Those give us useful reference points when we check the converted text later.
2. Insert the Image into a Blank Word Document
- Open Microsoft Word.
- Create a blank document.
- Drag the image file from your computer into the document.
You should now see the photo on the Word page. But try clicking the words inside it, and you will find that they are still part of a picture. You cannot place your cursor inside those words and change them yet.
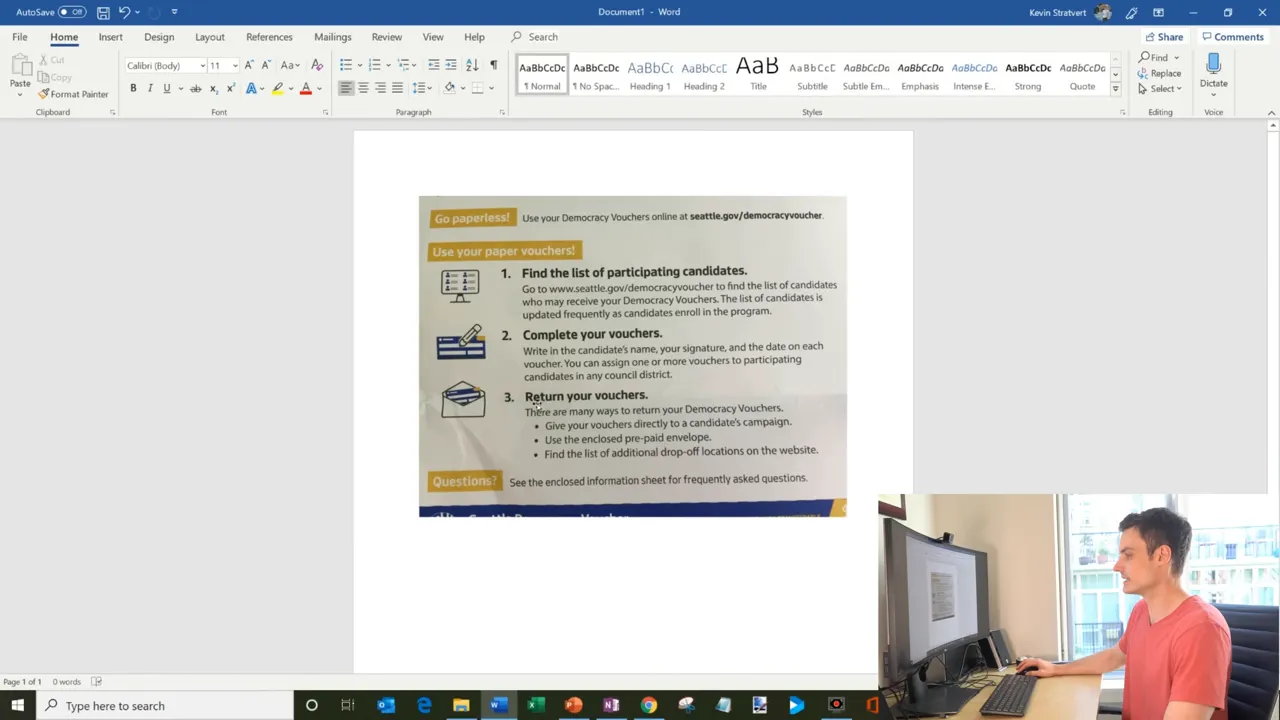
That is expected. Inserting an image and converting an image to editable text are two different things.
3. Save the Document as a PDF
Here is the extra step that makes this workflow possible:
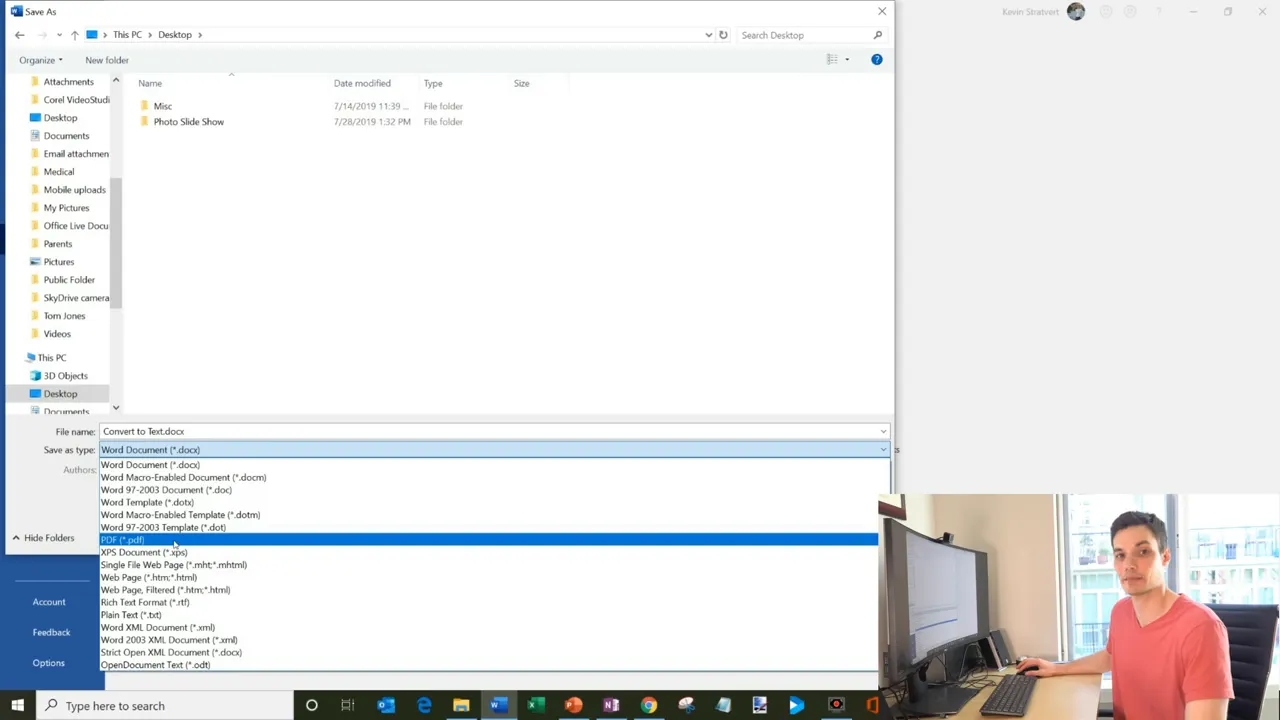
- Select File > Save As.
- Choose a location you can easily find again. I use the Desktop.
- Give the file a name, such as Convert to Text.
- In the Save as type menu, select PDF instead of Word Document.
- Select Save.
The saved PDF may open automatically in your PDF reader or browser. In my case, it opens in Microsoft Edge and shows the same image.
We are not finished yet. Saving the PDF creates the file that we will now ask Word to convert.
4. Open the PDF in Word
Return to Microsoft Word, then follow these steps:
- Select File > Open.
- Browse to the location where you saved the PDF.
- Select the PDF, such as Convert to Text.pdf, and open it.
- When Word displays its conversion message, select OK.
Word explains that it will convert the PDF into an editable Word document. It also warns that the process may take a little time and that the result will be optimized for editing, so the layout may change.
That is fine for this task. We want to work with the text rather than preserve a perfect copy of the printed page. For more background on this feature, Microsoft provides guidance on opening PDFs in Word.
Once the conversion finishes, try clicking within a sentence and typing. In my example, the words are now editable rather than locked inside the photograph.
5. Compare the Converted Text with the Original
Before you start making changes, put the original photo on one side of your screen and the converted Word document on the other. This makes it much easier to spot anything Word missed.
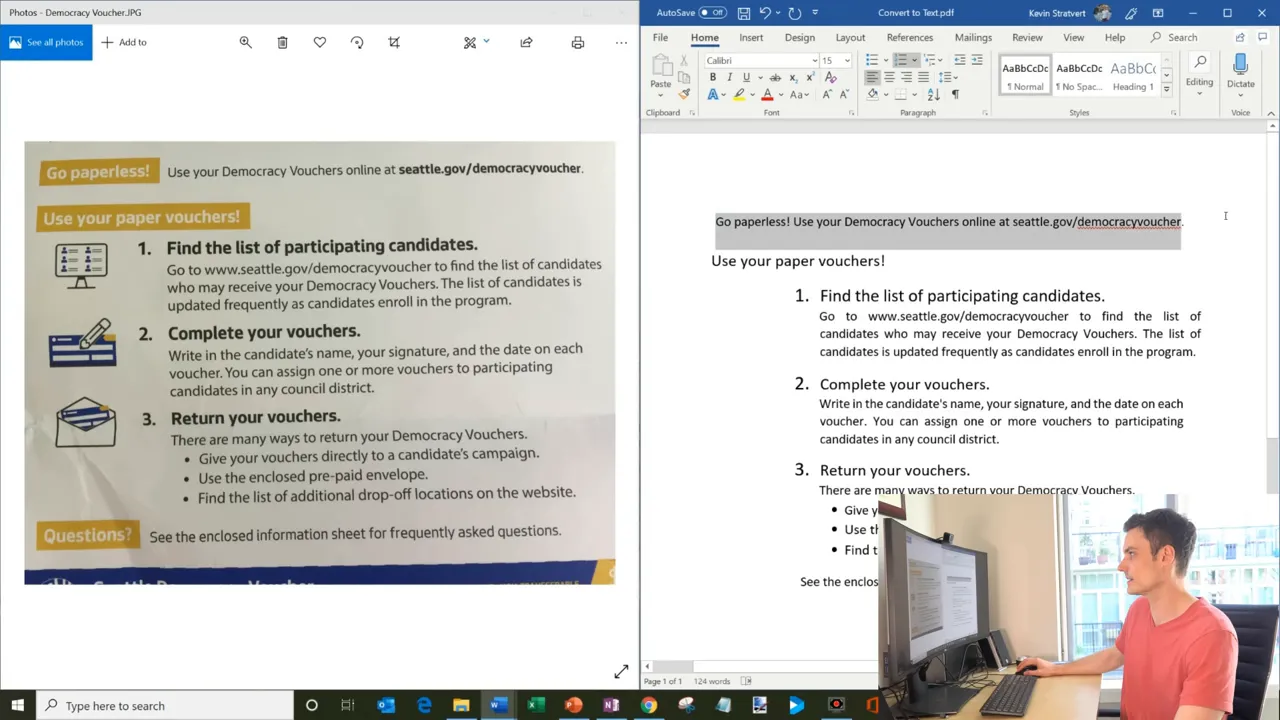
For the mailing, Word did a pretty good job. It recovered the paperless information, the web address, and the main numbered sections. However, it missed the questions area at the bottom.
A successful conversion still needs a check. Compare the headings, body text, web addresses, and smaller sections against the original. Add any missing text and adjust the formatting as needed.
Once you are happy with the result, save the edited document as a Word Document (.docx) so you can continue working on it.
The Key Is the PDF Step
The workflow is simple once you know the trick: photo, Word, PDF, then back into Word. Dropping a photo into a document only inserts a picture. Reopening the saved PDF in Word is the step that produced editable text in this example.
It is not a perfect reproduction of the original page, but it can save you from retyping an entire document. Check the recovered text, make your changes, and you have a Word document you can actually edit.
Made with VideoToBlog using How to Convert Image to Word Document


