You can turn a PowerPoint presentation into more than a sequence of slides. Add your voice, include your webcam, draw annotations as you explain, and export everything as a video ready for YouTube, Facebook, Vimeo, or another video service.
The nice thing is that you can do the recording and video creation right inside PowerPoint. Your slides, narration, webcam footage, animations, and recorded timings all come together in one MP4 file.
I’m using the Windows desktop version of PowerPoint included with Office 365 for this walkthrough. If you have an older version, the interface and available recording features may look different. For disclosure, I worked at Microsoft as a full-time employee when I created this walkthrough.
1. Open Record Slide Show
Start by opening the presentation you want to turn into a video. I’m using a short Kevin’s Cookie Company presentation with a company summary, new store locations, and sales results. Any slide deck you want to explain aloud can follow the same process.
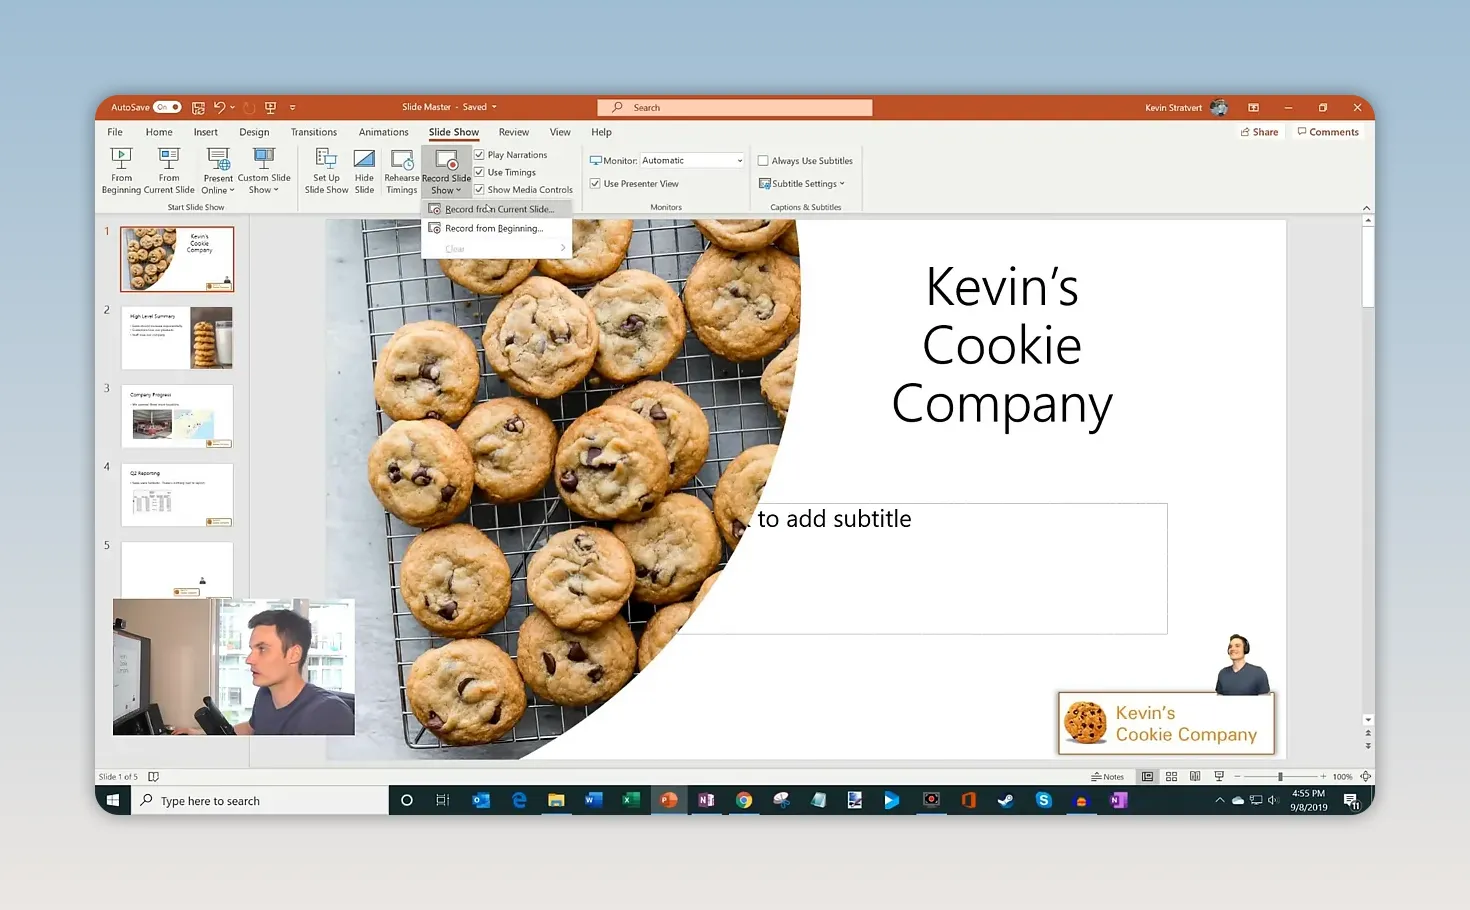
- Select the Slide Show tab on the ribbon.
- Open Record Slide Show.
- Choose whether to record from the current slide or from the beginning.
To record the complete presentation, choose From Beginning. If your first slide is already selected, either option starts in the same place.
2. Set Up Your Microphone and Webcam
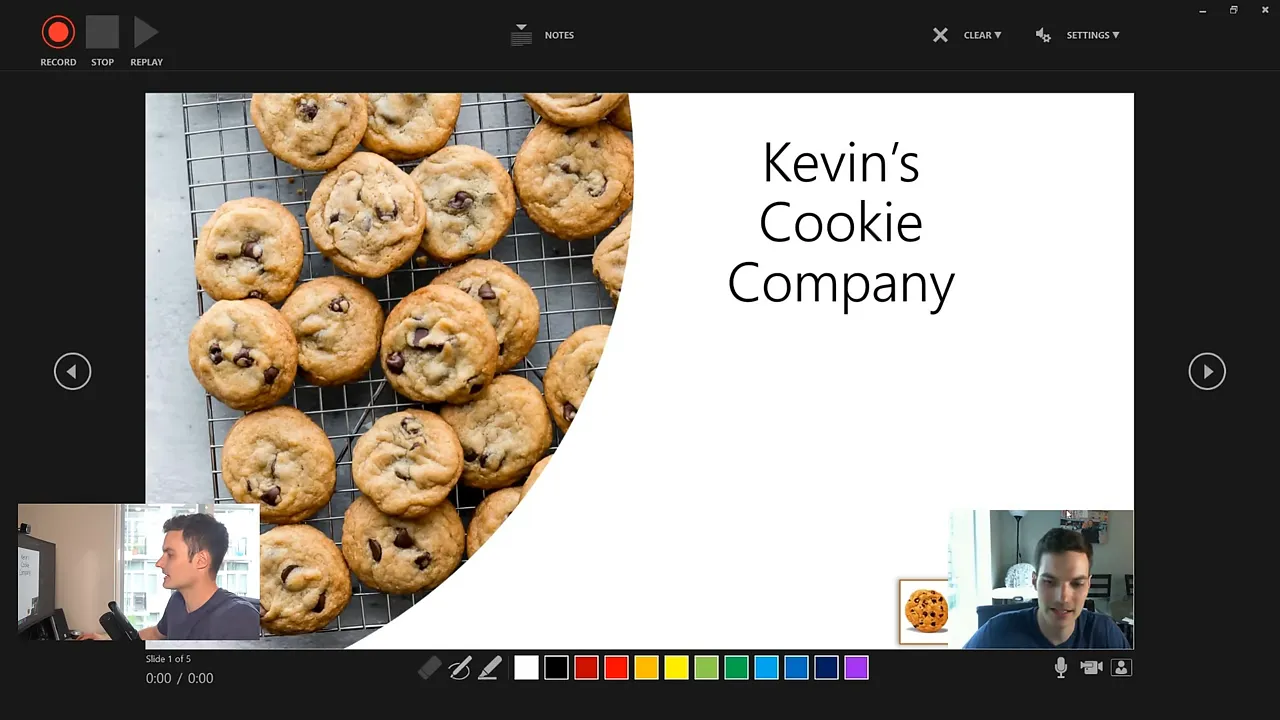
PowerPoint opens a recording screen with your slide in the center and recording controls around it. Before starting, take a moment to check your audio and camera settings.
- Record: The red button starts the recording.
- Stop: Ends the recording when you finish.
- Replay: Lets you review what you recorded and hear how it sounds.
- Settings: Lets you choose the microphone and camera to use.
- Microphone and camera controls: Let you turn audio or webcam capture on or off.
- Camera preview: Lets you show or hide the preview while preparing your recording.
If you want your face to appear alongside the presentation, enable your webcam. In my example, the webcam image sits in the bottom-right corner of the slide. If you only want narration over the slides, leave the microphone enabled and turn the camera off.
You can also display your notes in the recording interface. That gives you a reference for what you want to say as you work through the presentation.
3. Record Your Presentation and Annotate the Slides
Click Record, wait for the countdown, and start speaking. Advance through your slides as you would during a normal presentation. PowerPoint records your narration and the timing of your progress through the deck.
You also have a pen and highlighter available. Use these to draw attention to the parts of a slide you’re discussing. Those annotations become part of the recorded presentation, so they appear as you make them rather than simply sitting on the slide from the start.
For example, in my cookie company presentation, I:
- Draw an upward arrow beside a stack of cookies while explaining sales growth.
- Add a heart beside the summary points about customers and staff loving the company.
- Mark locations on a map while discussing new stores in Pennsylvania, New Jersey, and New York.
- Advance to the sales results slide and explain the company’s performance.
It’s a simple way to make a slide presentation feel more personal. Your voice supplies the explanation, your webcam adds a human presence, and your annotations help direct attention to the right detail.
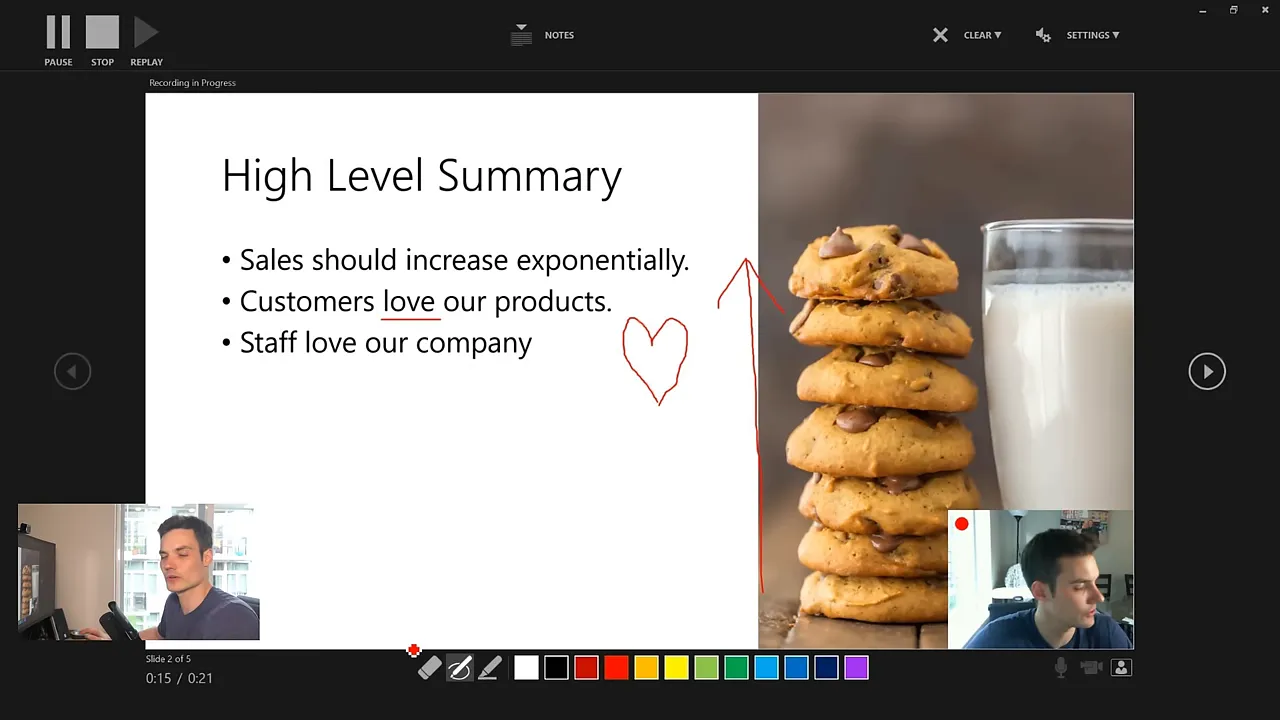
When you finish, click Stop. My sample recording is about a minute long. Close the recording screen to return to PowerPoint’s normal slide-editing view.
4. Review the Recording in Your Slide Deck
Back in the presentation, you’ll see the recorded webcam video on each slide where you used the camera. You can select that video and move it to a different position on the slide.
Use the video’s Play button to review the recording. You can also move between slides to check the recorded content throughout the deck.
At this point, you have two ways to share your work:
- Share the PowerPoint deck: Recipients can go slide by slide and play your recordings.
- Export a video: Package the presentation into a single file for a video platform.
To publish the presentation on YouTube or another video service, the next step is to create that video file.
5. Export PowerPoint as an MP4 Video
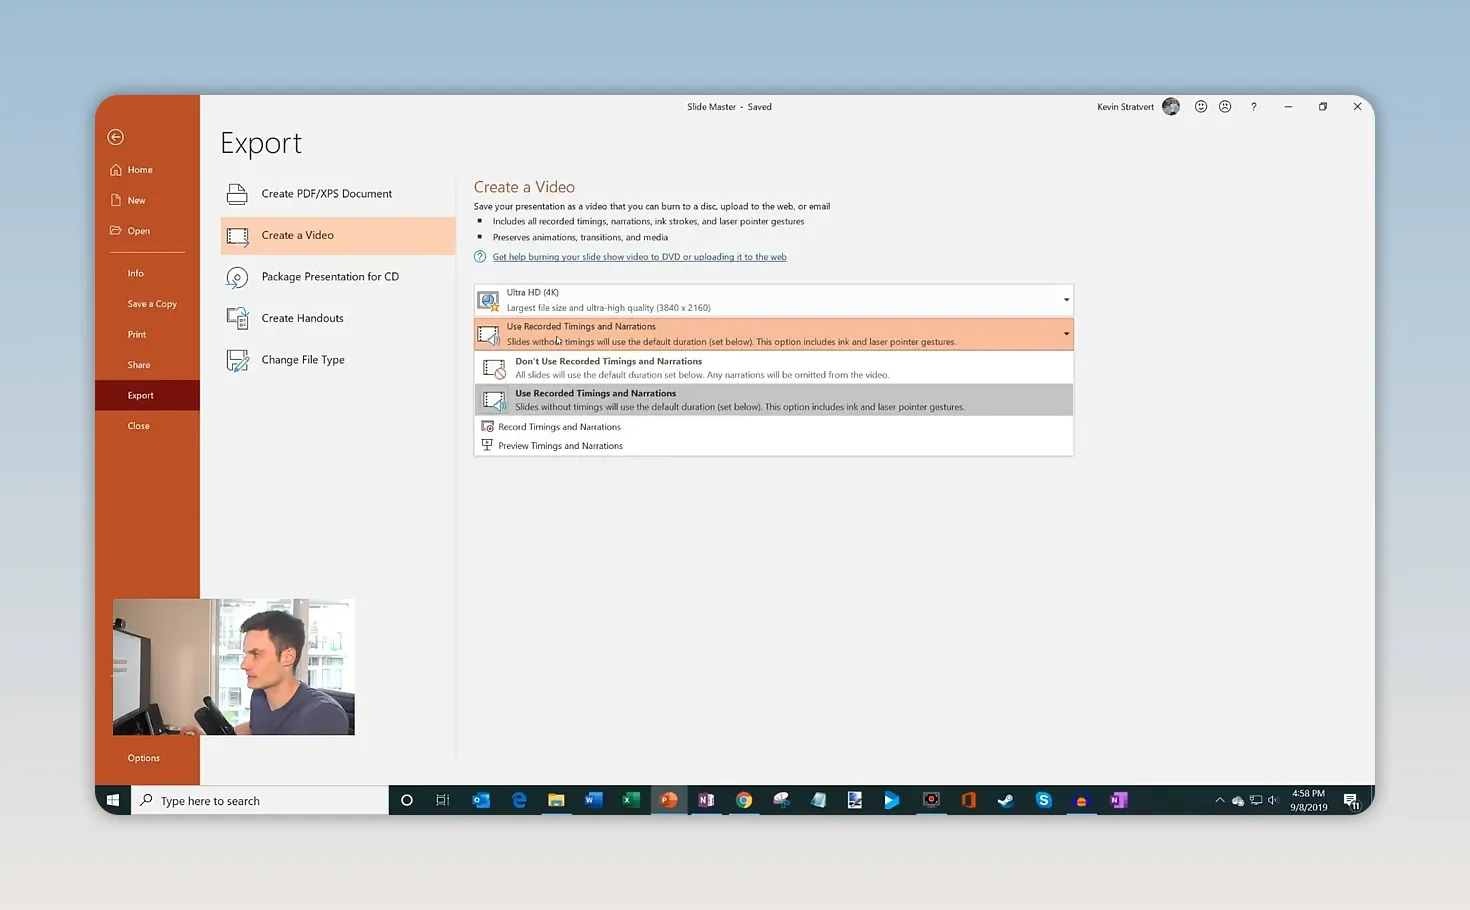
Open File > Export > Create a Video. This is where you choose the video quality and tell PowerPoint to use the recording you just made.
- Choose a resolution. The version I’m using offers options including Ultra HD, which is 4K, and Full HD, which is 1080p. I choose 4K for this example.
- Select Use Recorded Timings and Narrations. This preserves your spoken explanation and the pacing you recorded as you moved through the slides.
- Click Create Video.
- Choose a save location and filename. I save mine to the desktop as Kevin Cookie Company Video.
- Save as an MPEG-4 video. The resulting file has an .mp4 extension.
Wait for PowerPoint to finish rendering. You can follow the progress in the status area at the bottom of the window. The time required depends on factors such as the presentation’s length, the number of slides, and how much recorded video and narration it contains.
Once rendering finishes, open the saved MP4 and play it. In my example, the exported file includes the slides, narration, webcam image in the bottom-right corner, and the annotations appearing as I drew them.
This final check lets you confirm that everything came together before uploading the file.
6. Upload the Video to YouTube
Now you have a regular MP4 video file rather than just a PowerPoint presentation. To upload it to YouTube:
- Open YouTube and sign in to your channel.
- Select the Create button near the top-right corner.
- Choose Upload video.
- Select your exported MP4 file, or drag it from its saved location into the upload area.
The upload interface may change over time. You can find the current publishing instructions in YouTube’s upload guide.
You can use the same exported file with other video services, too. PowerPoint handles the presentation recording and video creation; you then upload the finished MP4 wherever you want to share it.
That’s the full process: record your slide show, review it, export using recorded timings and narrations, and upload the MP4. With those steps, an ordinary slide deck becomes a complete narrated video with your webcam and annotations included.
Made with VideoToBlog using How to Make a Video in PowerPoint - ppt to video


