Connecting one monitor to a laptop is usually straightforward. Plug it in, and you have more room to work. Add a second or third external monitor, though, and things can get confusing. A screen might stay blank, or two displays might show the same thing instead of giving you separate workspaces.
The good news is that you can often add more displays even when your laptop’s built-in video outputs have reached their limit. The key is choosing the right connection: a direct HDMI or USB-C connection, a USB display adapter, or a suitable docking station.
First, be clear about your goal. Two external monitors plus your laptop screen gives you three screens total. Three external monitors is a different setup, potentially giving you four screens if you also keep the laptop display active.
What You'll Learn
- Two external monitors plus your laptop display can create a three-screen workspace without a dock.
- Your laptop’s graphics processor limits simultaneous displays, regardless of how many ports are available.
- USB display adapters use drivers to add displays beyond the laptop’s native video outputs.
- HDMI splitters duplicate content rather than creating independent desktop workspaces.
Table of Contents
- 1. Connect Your First External Monitor
- 2. Add a Second External Monitor
- 3. Understand Why Another Monitor Might Not Work
- 4. Use a USB Display Adapter to Add More Screens
- 5. Use a Docking Station for a Cleaner Setup
- HDMI Splitter vs. Switch vs. Matrix: Choose the Right Device
- Start Simple, Then Add the Hardware You Need
1. Connect Your First External Monitor
Most laptops support at least one external monitor without an extra adapter or dock. Start with the simplest setup before buying additional hardware.
- Connect your monitor to a compatible video output on your laptop, such as HDMI or a USB-C connection that supports video.
- Wait for your laptop to detect the display automatically.
- On Windows, right-click an empty area of the desktop and select Display settings.
- Choose whether to duplicate your screen or extend your desktop.
These two display modes do very different things:
- Duplicate: Both screens show the same content.
- Extend: Each screen becomes part of a larger desktop, giving you room for different windows.
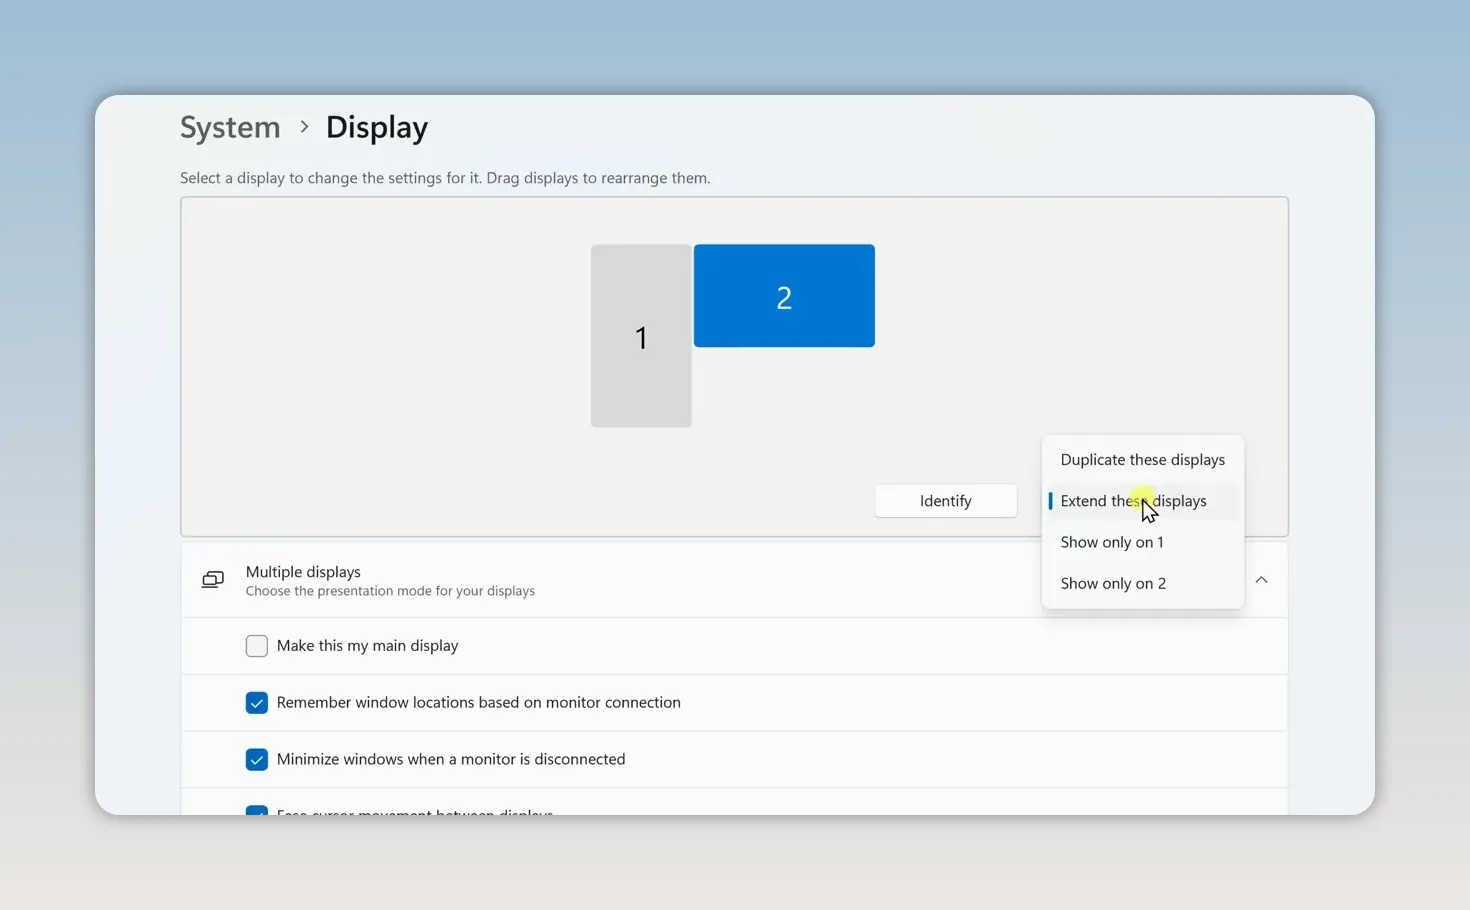
For everyday work, Extend these displays is usually the most useful option. You might keep email open on one screen and a browser or document on the other. You can then move windows between the screens instead of constantly switching between apps.
If you need more help with Windows display controls, Microsoft provides a guide to using multiple monitors in Windows.
2. Add a Second External Monitor
If your laptop has another compatible video output, try connecting a second external monitor directly. For example, you might connect one monitor through HDMI and another through USB-C.
In many cases, that is all you need. With the laptop display still active, you now have three screens total without a docking station or USB display adapter.
Return to Display settings and make sure the displays are extending your desktop rather than duplicating it.
However, having enough ports does not guarantee that every connected screen will work independently. That brings us to the limitation that often appears when you add another monitor.
3. Understand Why Another Monitor Might Not Work
Your laptop’s graphics processor, also called its GPU, has a limit on how many displays it can support simultaneously. The number of ports on the laptop is not the same as the number of displays it can drive.
Even if you can physically connect another monitor, you may have reached that graphics limit. When this happens, you might notice one of two results:
- The additional monitor is not detected or stays blank.
- The screens duplicate content instead of extending the desktop independently.
This is why simply finding another HDMI or USB-C port does not always solve the problem. You need a way to add a display beyond what the laptop’s built-in video outputs can provide.
A USB display adapter is one option. A suitable docking station can also help build a larger setup while keeping your connections organized.
4. Use a USB Display Adapter to Add More Screens
A USB display adapter works differently from connecting a monitor directly to the laptop’s HDMI or USB-C video output. It connects through USB and uses software to create an additional display.
Once you install the required driver, your computer can treat the connected monitor as another workspace, even when the laptop normally supports fewer displays through its native outputs.
For these examples, I partnered with OREI, which supplied the adapters and docking stations. The USB display adapter used here is listed for setups with up to four screens total, including the laptop display. Some product links are affiliate links, which may earn me a small commission at no extra cost to you.
- Connect the USB display adapter to your laptop.
- Connect the additional monitor to the adapter’s display output.
- Install the driver required by the adapter.
- Open Windows Display settings and choose to extend your desktop across the connected displays.
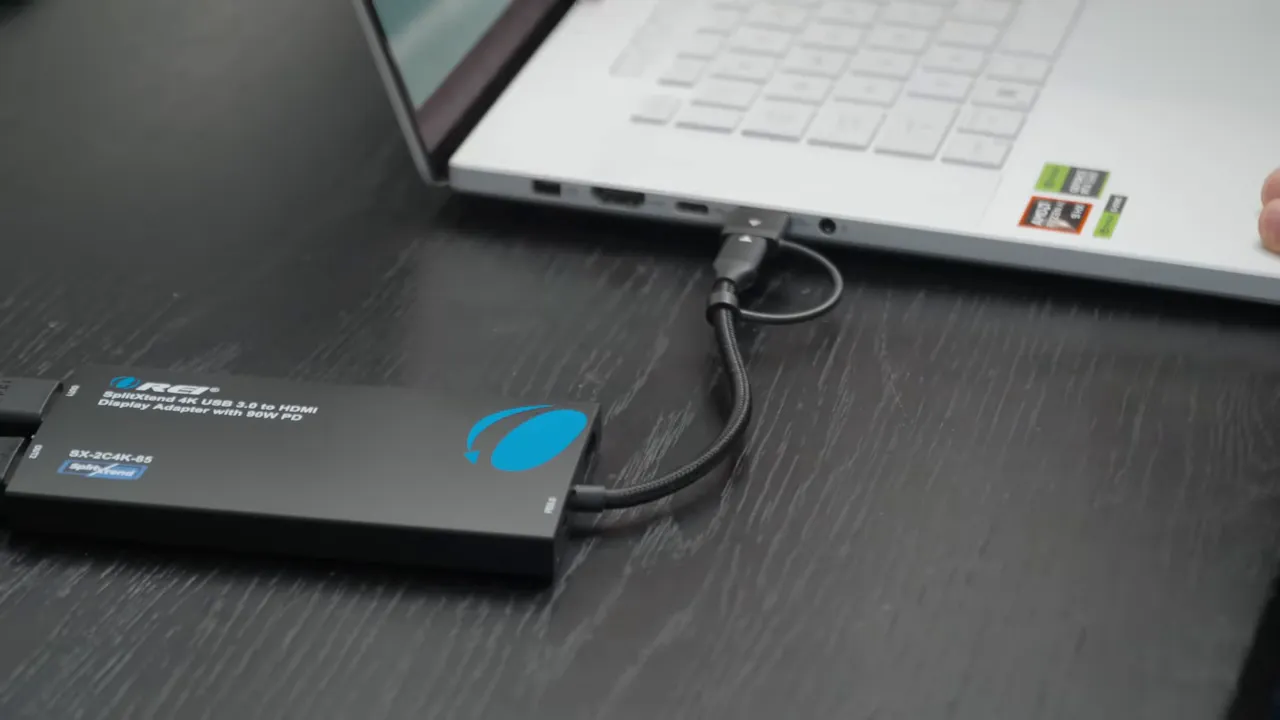
For example, you could leave one monitor connected directly through HDMI and connect another through the USB display adapter. Instead of showing the same image on both, you can move windows between them as separate parts of your desktop.
This is especially useful when your laptop normally supports only one external display, but you want a second external monitor. The important distinction is that you are using a USB display adapter with its required software, not simply adding another connector to the same native video output.
5. Use a Docking Station for a Cleaner Setup
A docking station is another option, particularly when you want multiple monitors and several accessories connected at your desk.
Rather than plugging everything into the laptop separately, you connect your equipment to the dock. The dock then connects to your laptop with a single cable, usually through USB-C.
Depending on the dock, those connections can include:
- Multiple monitors
- A keyboard and mouse
- An external drive or other USB devices
- Ethernet
- Power
The docking station used in this setup is listed for connecting up to three monitors and accessories through one cable. Choose a dock suited to your laptop and intended display setup rather than assuming that multiple monitor ports alone will overcome a display limit.
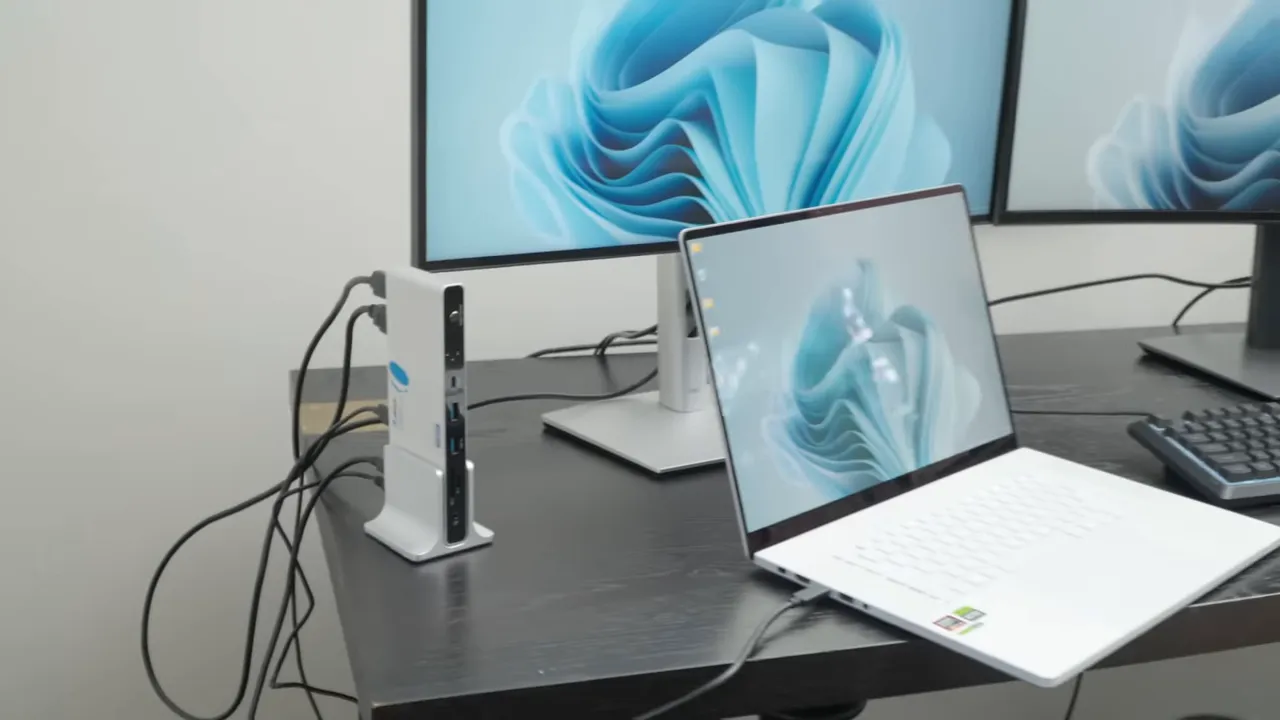
To build the setup, connect the monitors and peripherals to the dock, then connect the dock to your laptop. Use Windows Display settings to select an extended desktop for the connected screens.
The biggest convenience comes when you return to your desk. Instead of reconnecting each monitor, your keyboard, and your other accessories individually, you plug in one cable. For a workspace with two or three monitors and a few peripherals, that makes the whole setup much simpler.
HDMI Splitter vs. Switch vs. Matrix: Choose the Right Device
Several HDMI devices look like they might solve a multi-monitor problem, but they serve different purposes. If your goal is more desktop space, it is important not to confuse them with a USB display adapter or docking station.
HDMI Splitter: One Device on Multiple Screens
An HDMI splitter takes one input, such as a laptop or media player, and duplicates that signal across multiple displays.
This is useful in retail stores, at events, or anywhere you want the same content on several screens. A splitter does not create separate desktop workspaces. It sends the same source image to multiple destinations.
HDMI Switch: Multiple Devices on One Screen
An HDMI switch solves the opposite problem. You have several devices but only one display.
For example, you could connect a game console, streaming box, and laptop to a switch, then choose which device appears on the screen. It selects the source rather than adding monitors to your laptop.
HDMI Matrix: Multiple Devices on Multiple Screens
An HDMI matrix combines both ideas. It accepts multiple source devices and connects to multiple displays, allowing you to route a source to a chosen screen.
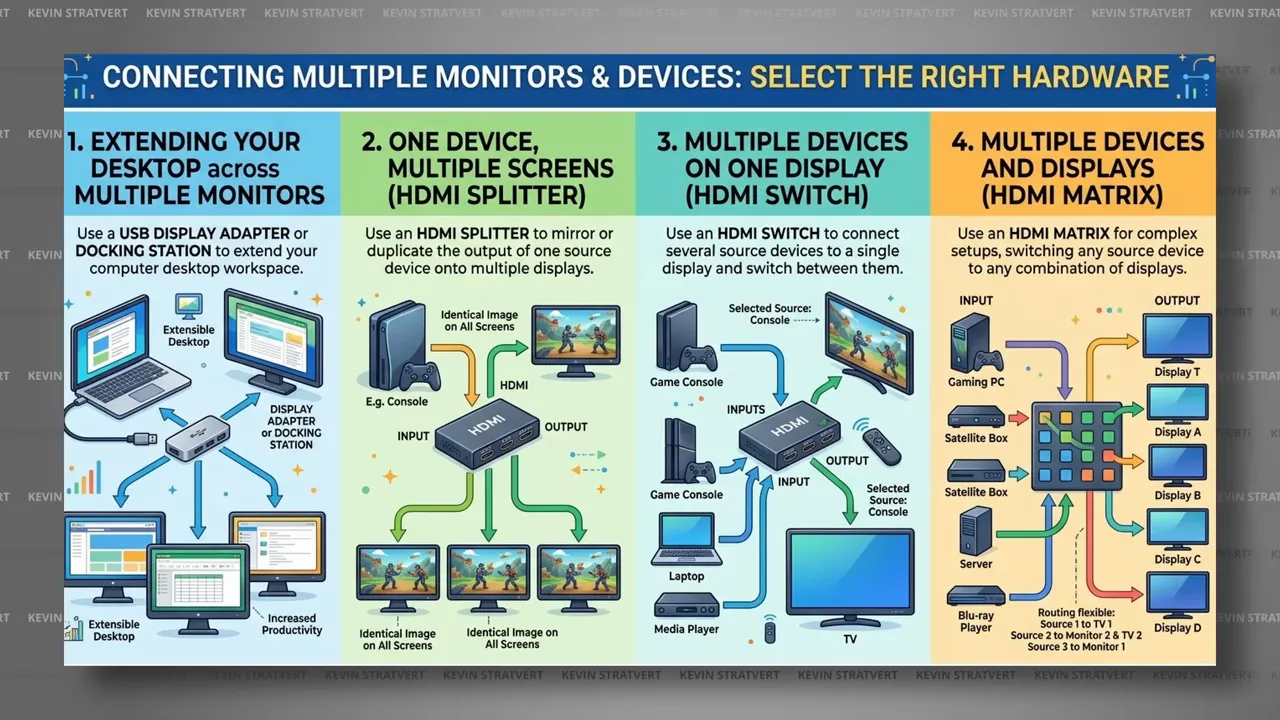
Here is the simplest way to remember the difference:
- USB display adapter or suitable dock: Add independent desktop workspaces.
- HDMI splitter: Show one source on multiple screens.
- HDMI switch: Choose between multiple sources on one screen.
- HDMI matrix: Route multiple sources to multiple screens.
Start Simple, Then Add the Hardware You Need
Begin by connecting monitors directly to your laptop and choosing Extend in Windows Display settings. That may already give you the three-screen workspace you need if you are counting the laptop display.
If another monitor stays blank or cannot work as an independent screen because you have reached the laptop’s native display limit, a USB display adapter can provide another route. If you also want your monitors and accessories connected through one cable, consider a suitable docking station.
The goal is not just to connect more screens. It is to make each screen useful, with separate space for the apps and documents you need.


