You don’t need to download a screen recorder to make a quick recording on Windows 10. There’s a free app built right into Windows called Xbox Game Bar, and despite the name, you don’t need an Xbox to use it.
Game Bar can record games, browser windows, and other app windows, with options to include app audio and your microphone. The main limitation is that it records one window at a time, not your entire desktop.
Here’s how to start a recording, find the finished MP4 file, and adjust the settings that matter.
What You'll Learn
- Use Xbox Game Bar to record a Windows 10 app without downloading additional software.
- Start and stop recordings with Windows + Alt + R, and enable your microphone for narration.
- Find your finished MP4 through the capture gallery and open it in File Explorer.
- Game Bar captures one window at a time, not your entire desktop.
1. Open the App or Game You Want to Record
Start by opening the window you want to capture. For my example, I’m using Parkitect, a game where you build an amusement park. There are roller coasters, spinning rides, and a day and night cycle. A park full of illuminated rides makes a little more interesting recording than my desktop!
You don’t have to use a game, though. You can follow the same process with a browser or another supported app.
Choose your window before you begin. Game Bar is designed to capture an individual app, so it isn’t the right tool for recording a walkthrough that moves across your desktop and several different windows.
2. Launch Xbox Game Bar
There are two easy ways to open Game Bar:
- Open the Start menu, type Game Bar, and select Xbox Game Bar.
- Press Windows + G on your keyboard. Think of G as “game.”
Game Bar opens as an overlay with several panels. You may see audio controls, performance information, and Xbox social features. For screen recording, the panel you need is Broadcast & capture, also called the Capture panel.
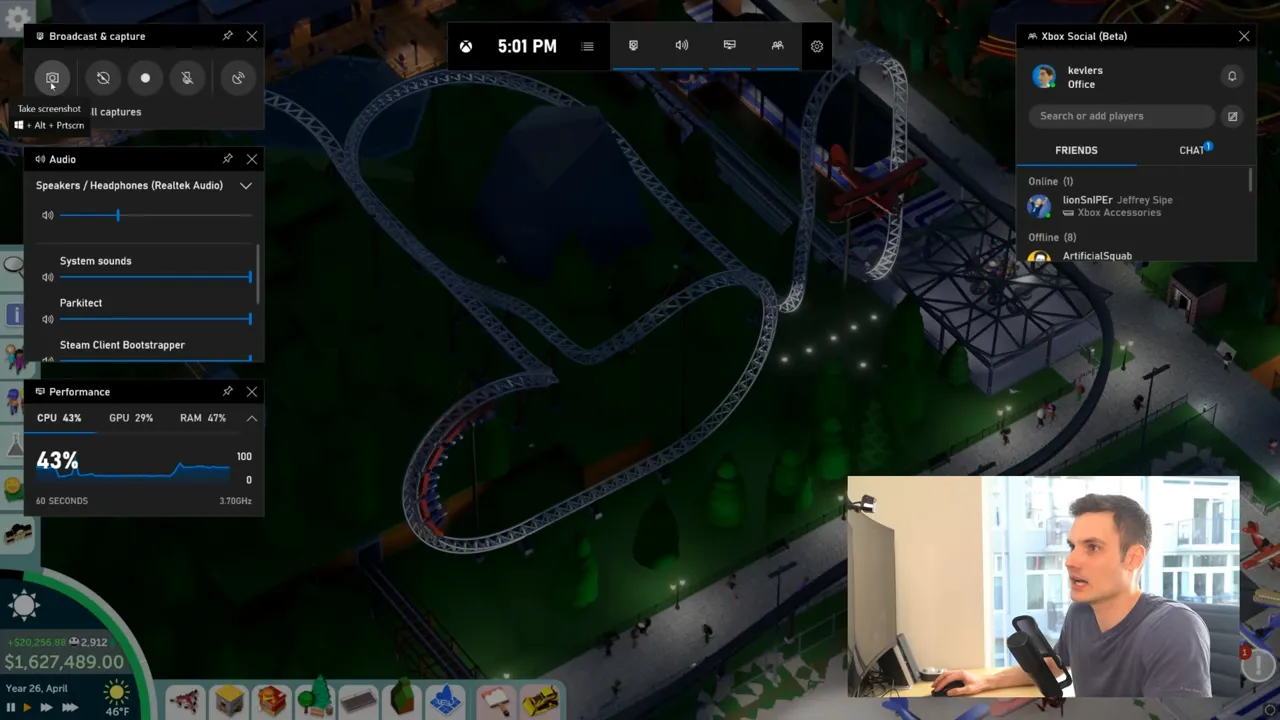
The capture controls give you a few different options:
- Take a screenshot: Capture a still image rather than a video.
- Record the last 30 seconds: Save a recent moment when background recording is available.
- Start recording: Begin a new video recording of the current app.
- Microphone: Control whether your voice is included.
The last 30 seconds option is especially handy for games. If something great happens before you think to start a recording, this feature can help you save that moment.
3. Start Recording and Add Your Microphone
Click Start recording in the Capture panel. You can also use Windows + Alt + R to begin recording directly.
A small recording status control appears with an elapsed-time counter, a stop button, and a microphone control. The timer is your confirmation that the recording is underway.
- Start the recording with the record button or Windows + Alt + R.
- Enable the microphone if you want to narrate what you’re doing.
- Use the app normally while Game Bar captures it.
- Click Stop when you’re finished, or press Windows + Alt + R again.
In my Parkitect example, I move around the amusement park, zoom in on the rides, and show the lights at night. That’s all there is to the actual recording process: start the capture, do whatever you want to demonstrate, and stop when you’re done.
Windows displays a notification confirming that the game clip has been recorded. Even when you’re recording something other than a game, Game Bar uses this gaming-focused language.
4. Find and Play Your Screen Recording
Once you’ve stopped recording, press Windows + G again and select Show all captures. This opens the capture gallery, where you can select your new clip and play it back.
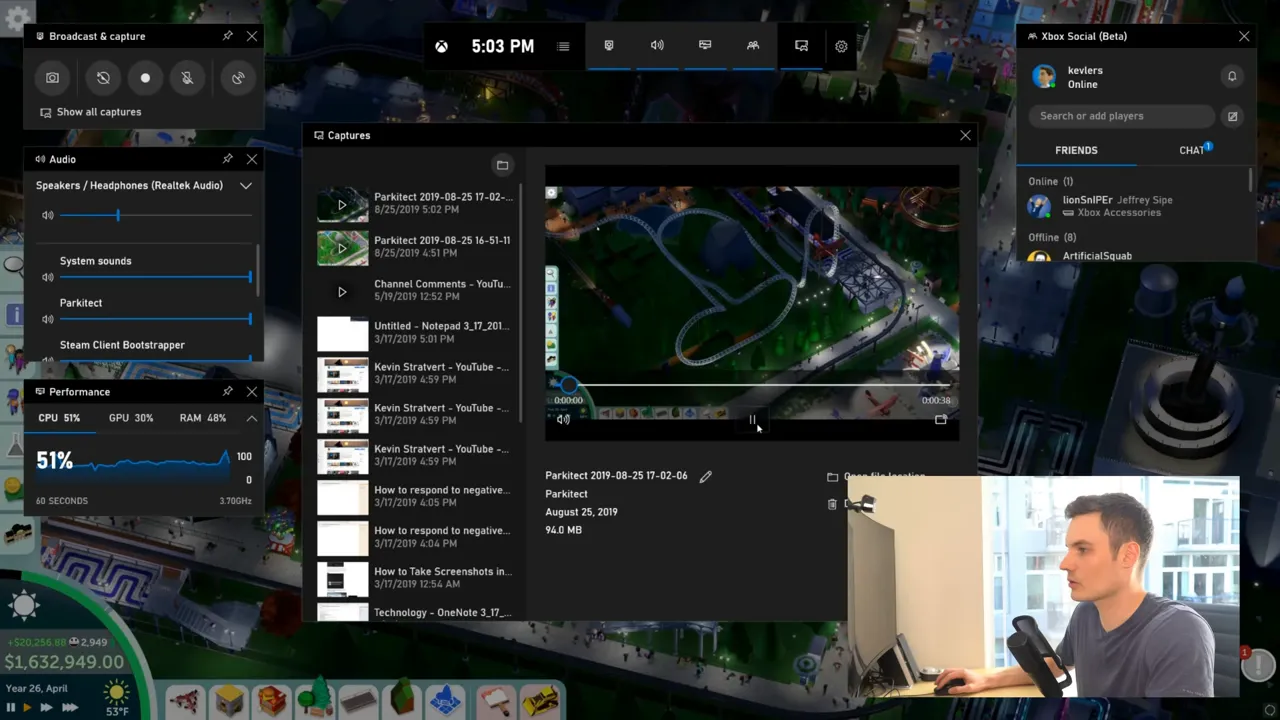
To get to the actual video file:
- Select the recording in the capture gallery.
- Click Open in File Explorer.
- If you have lots of recordings, sort the files by date to find the most recent one.
- Double-click the file to play it in your video player.
Your recording is an MP4 file. That means you have a video file you can work with outside Game Bar. For example, you can upload it to YouTube or Facebook rather than keeping it inside the capture gallery.
5. Adjust Game Bar’s Recording Settings
The default controls are enough for a quick capture, but a few settings are worth exploring. Press Windows + G, then click the Settings gear.
Review and Customize Keyboard Shortcuts
Open Shortcuts to see the available keyboard commands and assign custom shortcuts where supported. Once you know the shortcuts, you don’t have to keep opening the overlay and clicking buttons.
These are the key combinations to remember:
- Windows + G: Open Xbox Game Bar.
- Windows + Alt + R: Start or stop a recording.
- Windows + Alt + Print Screen: Take a screenshot.
The Shortcuts settings also show commands for other capture features, including recording the last 30 seconds.
Choose Which Audio to Record
Under Capturing, you can decide what audio should be included. The choices let you capture:
- Game audio and your microphone for gameplay with commentary.
- All audio when you want a broader audio capture.
- No audio when you only need the picture.
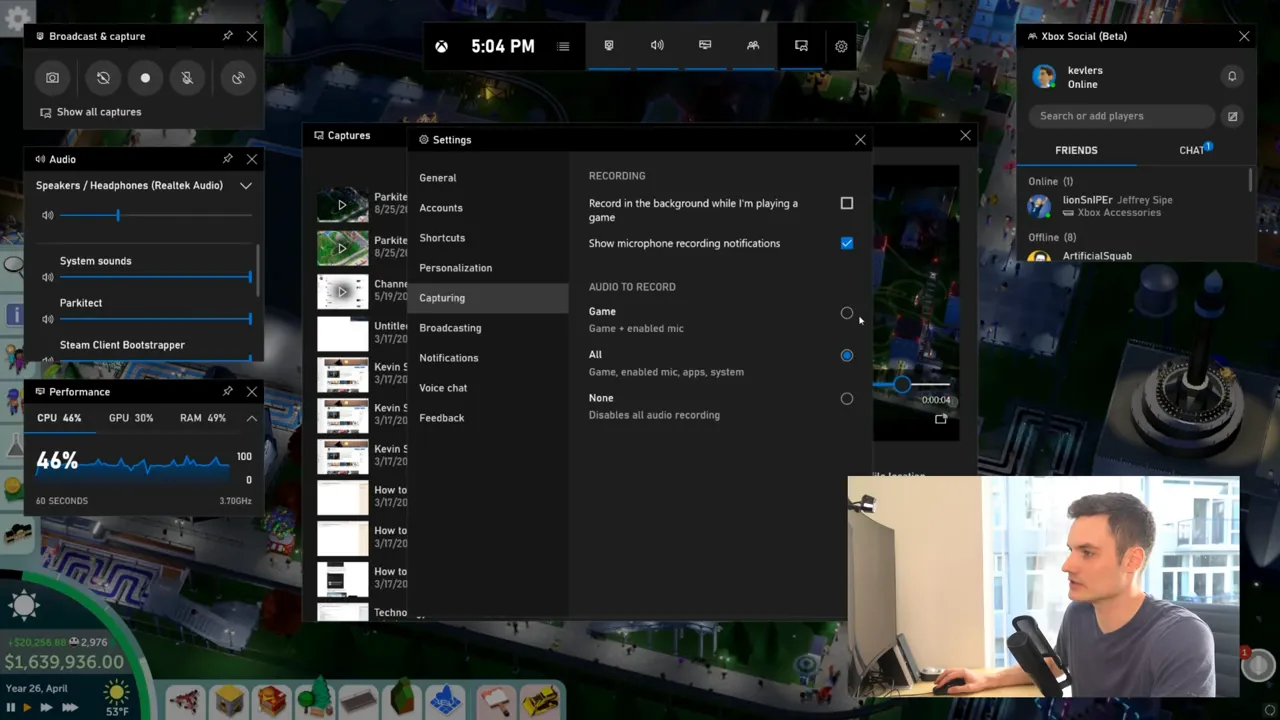
The microphone button on the recording control lets you manage your voice during the capture. The Capturing settings determine the broader audio behavior, so it’s useful to check both before making a recording you want to keep.
Change the Theme and Notifications
Under Personalization, you can switch between a light theme and a dark theme. If you prefer a darker interface at night, that option is available.
The Notifications settings let you control Game Bar notifications, including turning them off while you’re playing or recording. There are other preferences in Settings as well, but shortcuts, audio, appearance, and notifications are good places to start.
Other Useful Game Bar Panels
Screen recording is only one part of Game Bar. A few of the other panels can be useful while you’re capturing an app:
- Audio: Adjust sound levels, such as the game’s volume relative to system sounds.
- Performance: Check how your computer is handling the game and recording at the same time.
- Xbox Social: See which Xbox friends are online.
You don’t need to use the social features or all the extra panels to record your screen. The capture controls do the essential work.
Know Game Bar’s Limitations
Game Bar is convenient, especially when you need a screen recorder in a hurry, but it has some important drawbacks:
- It records one window at a time. It isn’t a full desktop recorder.
- Some menus may not appear in the recording. In traditional Windows desktop apps, such as Word, certain file menus may not be captured.
- It offers less customization than a dedicated recording tool. More involved recording projects may need something more powerful.
These limitations matter if you’re creating a software tutorial. Recording the main app window is useful, but if an important menu doesn’t appear in the finished clip, the instructions may be incomplete. Play back a short test recording before committing to a longer one.
When to Use OBS Studio Instead
If you need more control, OBS Studio is another free screen recorder worth considering. It offers considerably more customization than Game Bar, but it requires a download and takes a few more steps to set up.
For a related walkthrough, I also have a guide to recording your screen and webcam simultaneously.
For a quick recording of a game, browser, or app window, though, Xbox Game Bar is a solid place to start. Open your app, press Windows + Alt + R, and you can create a screen recording without installing anything extra.
Made with VideoToBlog using How to Screen Record on Windows 10


