Taking a screenshot on Windows 10 doesn’t require downloading anything. You already have two useful options: the Snipping Tool, which lets you choose exactly what to capture and add annotations, and Print Screen keyboard shortcuts, which make quick captures easy.
The important part is knowing not only how to take the screenshot, but also where it goes afterward. Some methods save a file automatically. Others copy the image to your clipboard so you can paste it into an app and save it yourself.
What You'll Learn
- The Snipping Tool captures selected areas or windows and lets you annotate before saving.
- Print Screen captures the entire screen, while Alt + Print Screen captures only the active window.
- Windows + Print Screen automatically saves an image to your Pictures folder under Screenshots.
- Clipboard captures need pasting into an app unless OneDrive saves a copy automatically.
Method 1: Take a Screenshot with the Snipping Tool
The Snipping Tool is handy when you want just part of your screen rather than everything on your desktop. You can also use it to capture a window, draw around an area, or highlight something before sharing it.
Open the Snipping Tool
The quickest way to find it is through Windows search:
- Click the search box on your taskbar.
- Type Snipping Tool.
- Select the app from the search results.
You can also open the Start menu, scroll down to Windows Accessories, and select Snipping Tool. That folder contains other built-in tools, including Notepad and WordPad.
If you take screenshots often, right-click Snipping Tool and choose Pin to Start. Alternatively, select More > Pin to taskbar to keep it one click away. I keep it on the taskbar because it’s a tool I use quite a bit.
The steps below use the classic Windows 10 Snipping Tool interface. For Microsoft’s guidance across different versions of the app, see its Snipping Tool instructions.
Choose What You Want to Capture
Open the Mode menu to choose from four types of screenshots:
- Full-screen Snip: Capture your entire desktop.
- Window Snip: Select a window, such as your browser, to capture it separately from the rest of your desktop.
- Rectangular Snip: Click and drag to draw a rectangle around the area you want.
- Free-form Snip: Draw a custom outline around the content you want to capture.
For a clean capture of one section of a page, rectangular snip is an easy choice. Select the mode, start a new snip, and drag around the content. When you release the mouse button, the captured image opens in the Snipping Tool.
Free-form snip gives you more flexibility, although drawing a neat shape with a mouse takes a little practice. I tried outlining a picture of myself, and my attempt at a rectangle wasn’t exactly precision engineering. It still captured the area I needed.
Annotate Your Screenshot
Once you have your screenshot, you can mark it up directly in the app:
- Use the Pen to draw or call attention to something.
- Use the Highlighter to emphasize text or another part of the image.
- Use the Eraser to remove unwanted annotations.
For a quick test, I gave myself a little mustache with the pen and a very yellow fake tan with the highlighter. Neither was an improvement, but the same tools are useful for pointing out a detail or highlighting important text. And thankfully, there’s that eraser.
Save, Copy, or Email the Screenshot
To save your capture, select File > Save As, choose a folder, enter a filename, and select a file type. The available image formats include PNG, GIF, and JPEG, with PNG selected by default.
You can also use the toolbar’s save button, copy the screenshot to use elsewhere, or use the email option to send it to someone.
Where does it save? With the Snipping Tool, you choose the location in the Save As dialog. You aren’t limited to a dedicated Screenshots folder.
Set a Delay Before Capturing
The Snipping Tool also includes a Delay option. Choose a delay before starting your snip to give yourself a little time to get the screen ready.
Think of it like the timer on a family photo: press the button, get everything into position, and then capture it. At least with a screenshot, you don’t have to worry about someone closing their eyes.
Method 2: Take a Screenshot with Your Keyboard
For quick captures, your keyboard offers a few useful shortcuts. Start by finding the Print Screen key. Depending on your keyboard, it may be labeled Print Screen, PrtScn, or PrtSc.
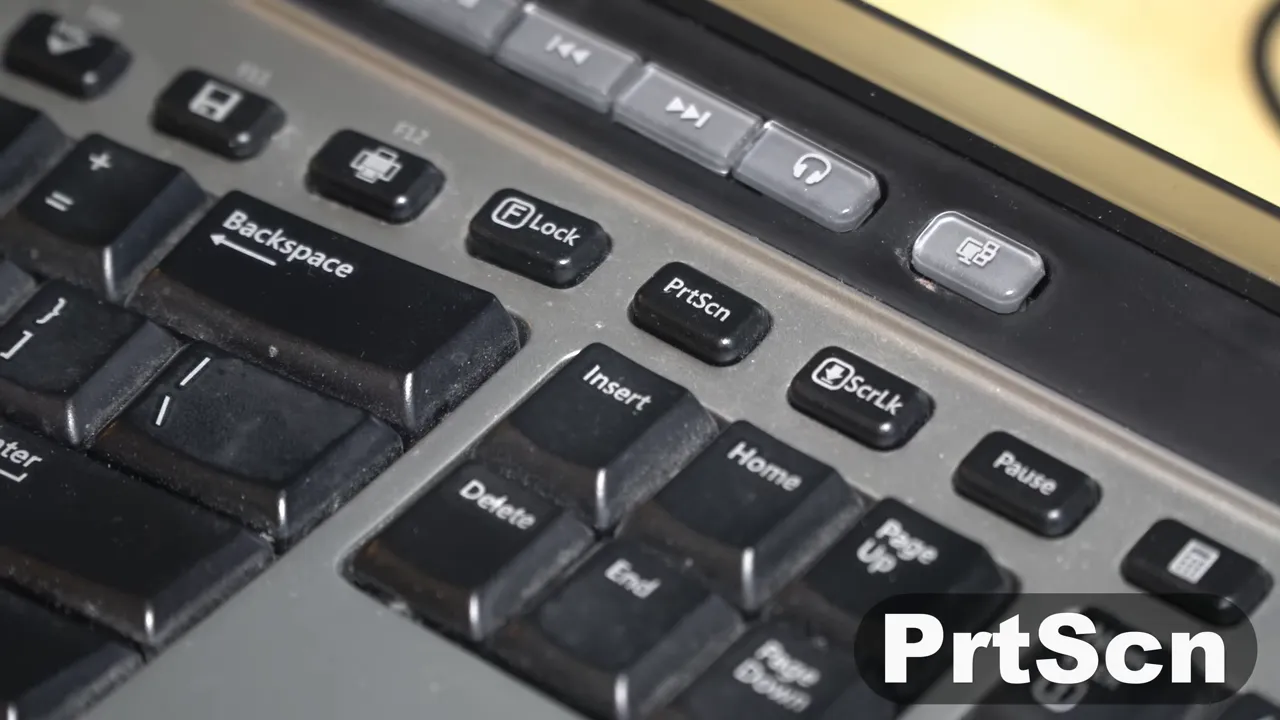
On some keyboards, Print Screen is a secondary function. For example, on my Dell keyboard, the label is blue, so I hold Fn while pressing the Print Screen key. My Microsoft keyboard has a dedicated PrtScn key, while my Lenovo laptop labels it PrtSc.
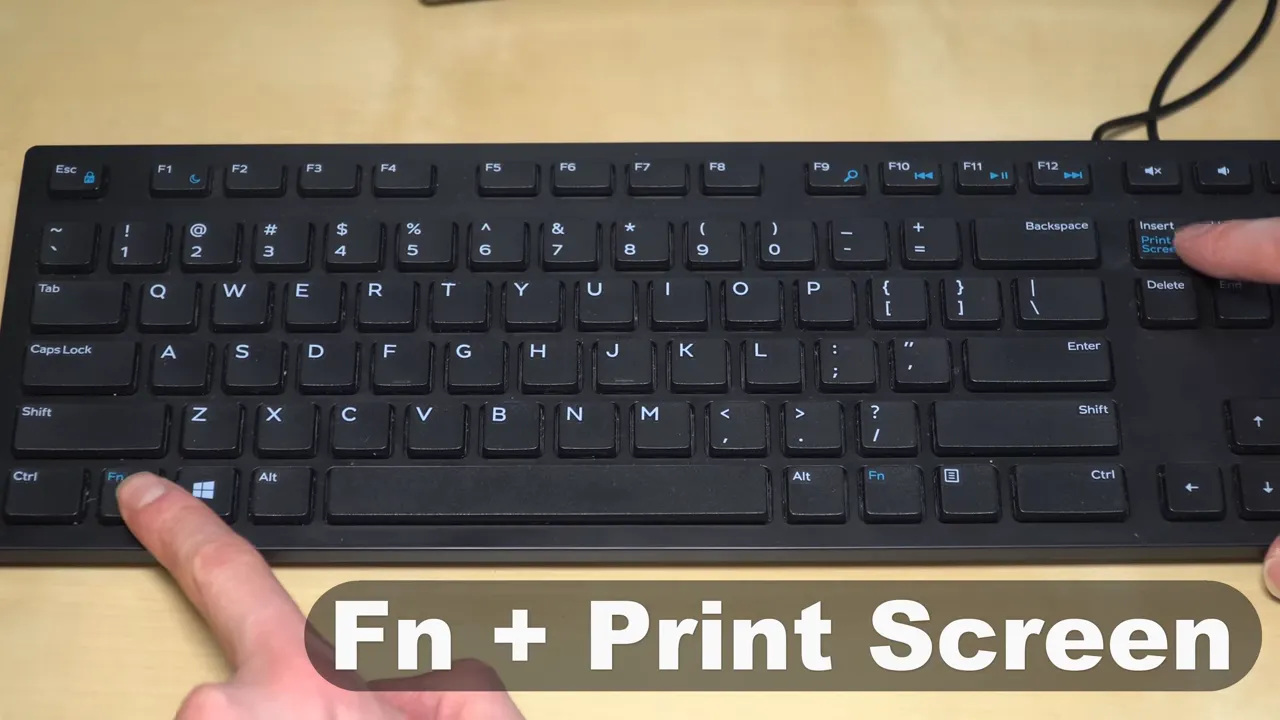
Print Screen: Capture the Entire Screen
Press PrtScn, or Fn + PrtScn if your keyboard requires it, to capture the entire screen.
Normally, this copies the screenshot to the clipboard. It doesn’t necessarily create a file you can find in a folder. To save it:
- Open Paint.
- Press Ctrl + V to paste the screenshot.
- Save the image in your preferred location.
If OneDrive is configured to save screenshots automatically, pressing Print Screen can also save a copy in OneDrive. That’s why the same key can appear to behave differently on different PCs.
Alt + Print Screen: Capture Only the Active Window
If you want just one window rather than the entire desktop, click that window first, then press Alt + PrtScn.
This captures only the active window, even if your desktop is larger or other windows are visible around it. You can then paste the capture into Paint and save it, just as you would with a full-screen capture. Add Fn if your keyboard requires it to activate Print Screen.
Windows + Print Screen: Save a Screenshot Automatically
To capture the entire screen and save a file in one step, press Windows + PrtScn.
To find the saved image, open File Explorer and go to:
This PC > Pictures > Screenshots
The usual local folder path is C:\Users\(YourName)\Pictures\Screenshots, where (YourName) represents your Windows user folder.
Where Did My Screenshot Go?
If you’ve taken a screenshot but can’t find it, check which method you used:
- Snipping Tool: The image stays in the app until you save it. Check the folder you selected in Save As.
- Print Screen or Alt + Print Screen: The image is generally on the clipboard. Paste it into Paint to access and save it.
- Windows + Print Screen: Look in your Pictures folder, inside Screenshots.
- OneDrive screenshot saving enabled: Check OneDrive > Pictures > Screenshots.
Use the Snipping Tool when you need a specific area, annotations, or a delay. Use Print Screen shortcuts when speed matters, and choose Windows + Print Screen when you want an image file saved automatically. Those two approaches cover everything from a small piece of a page to your whole desktop.
Made with VideoToBlog using How to Take a Screenshot on Windows 10


